

How to add split sittings to an experience
Configure multiple sittings for an experience, including distinct times and labels such as Sitting 1. Verify that the split availability appears correctly on the customer-facing booking page.
Tip: Use split sittings to double its table turnover, maximise daily revenue, and accommodate more guests in a small dining space
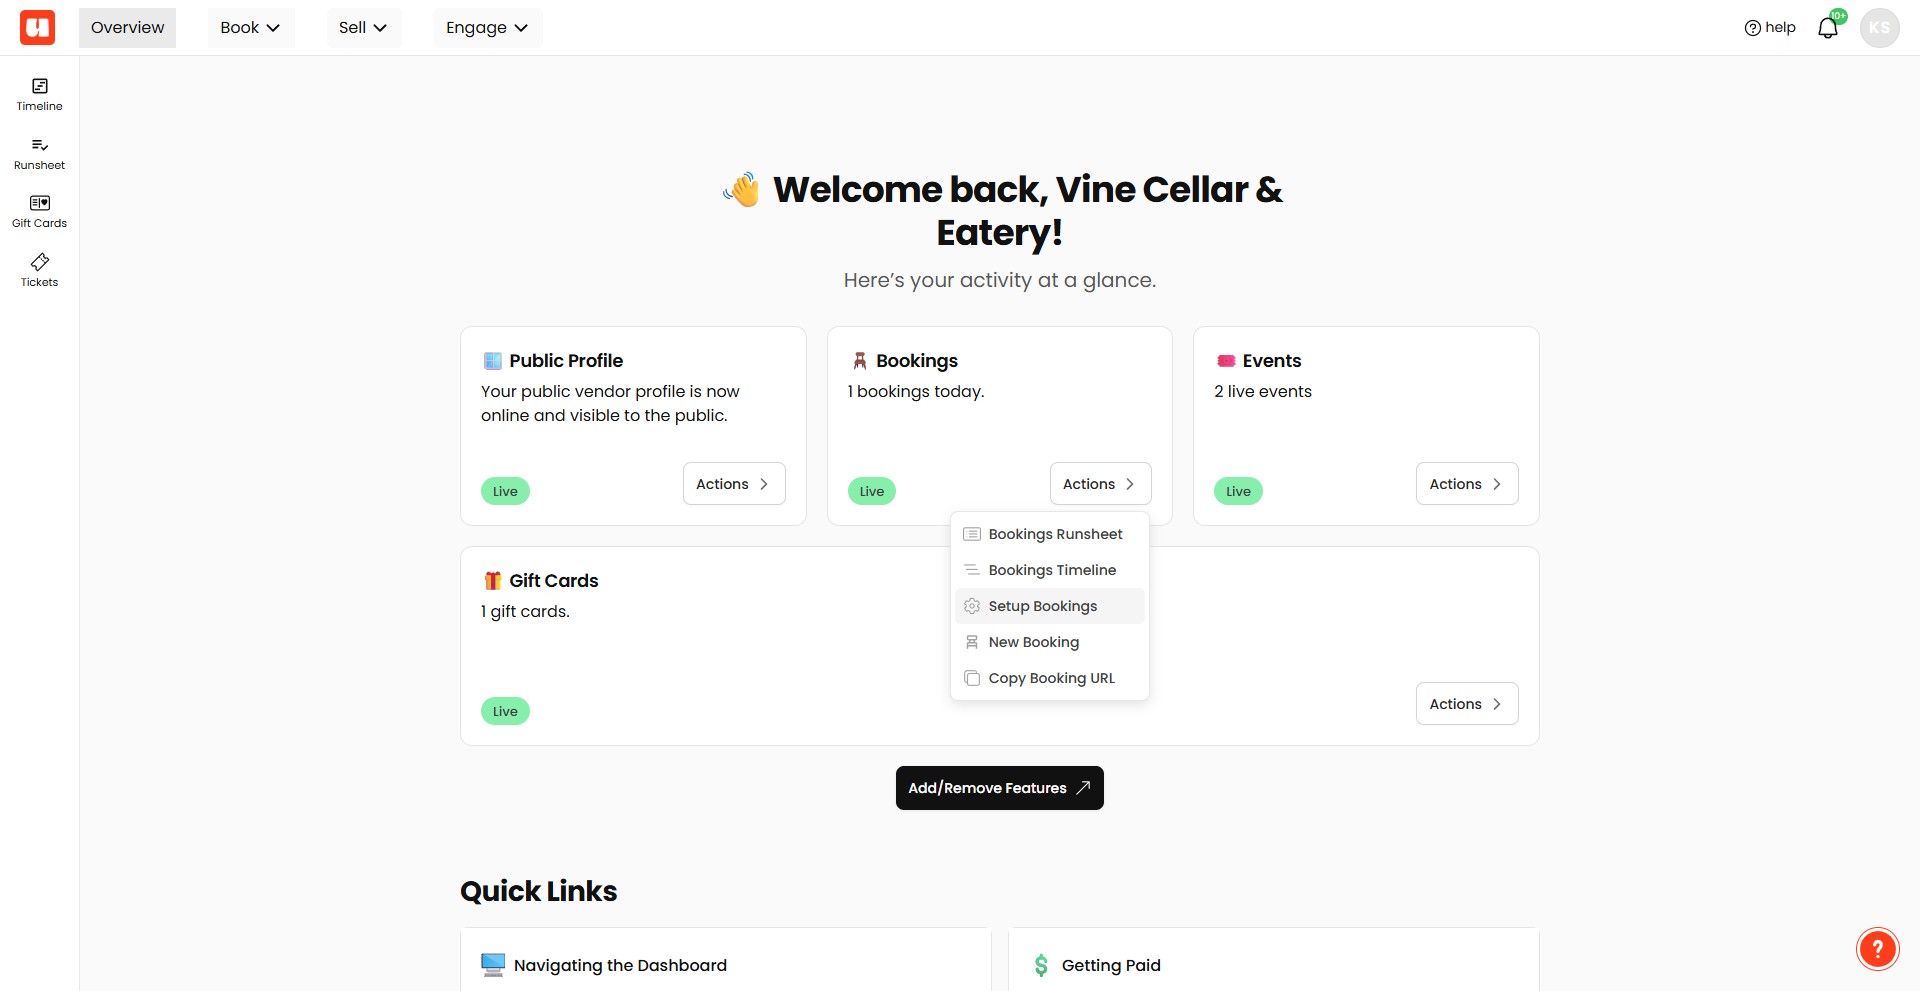
Open the Bookings card’s Actions menu and select Setup Bookings
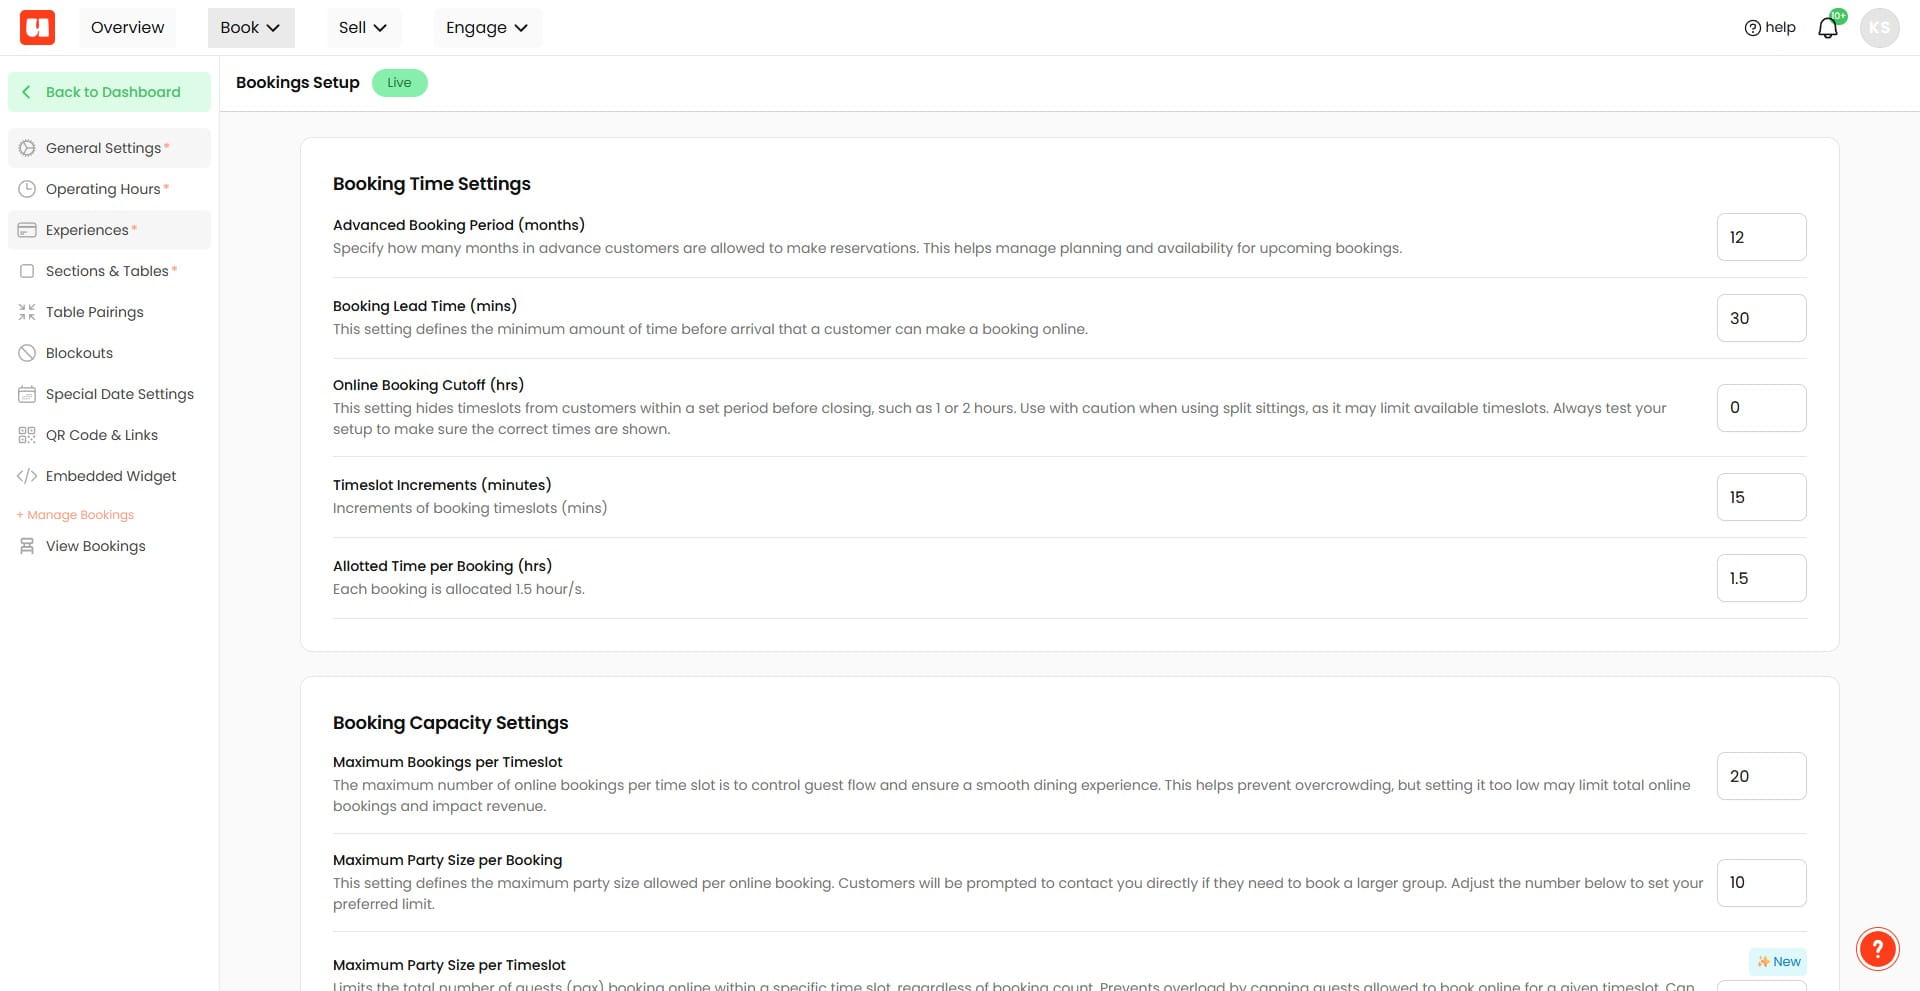
Select Experiences from the Bookings Setup menu
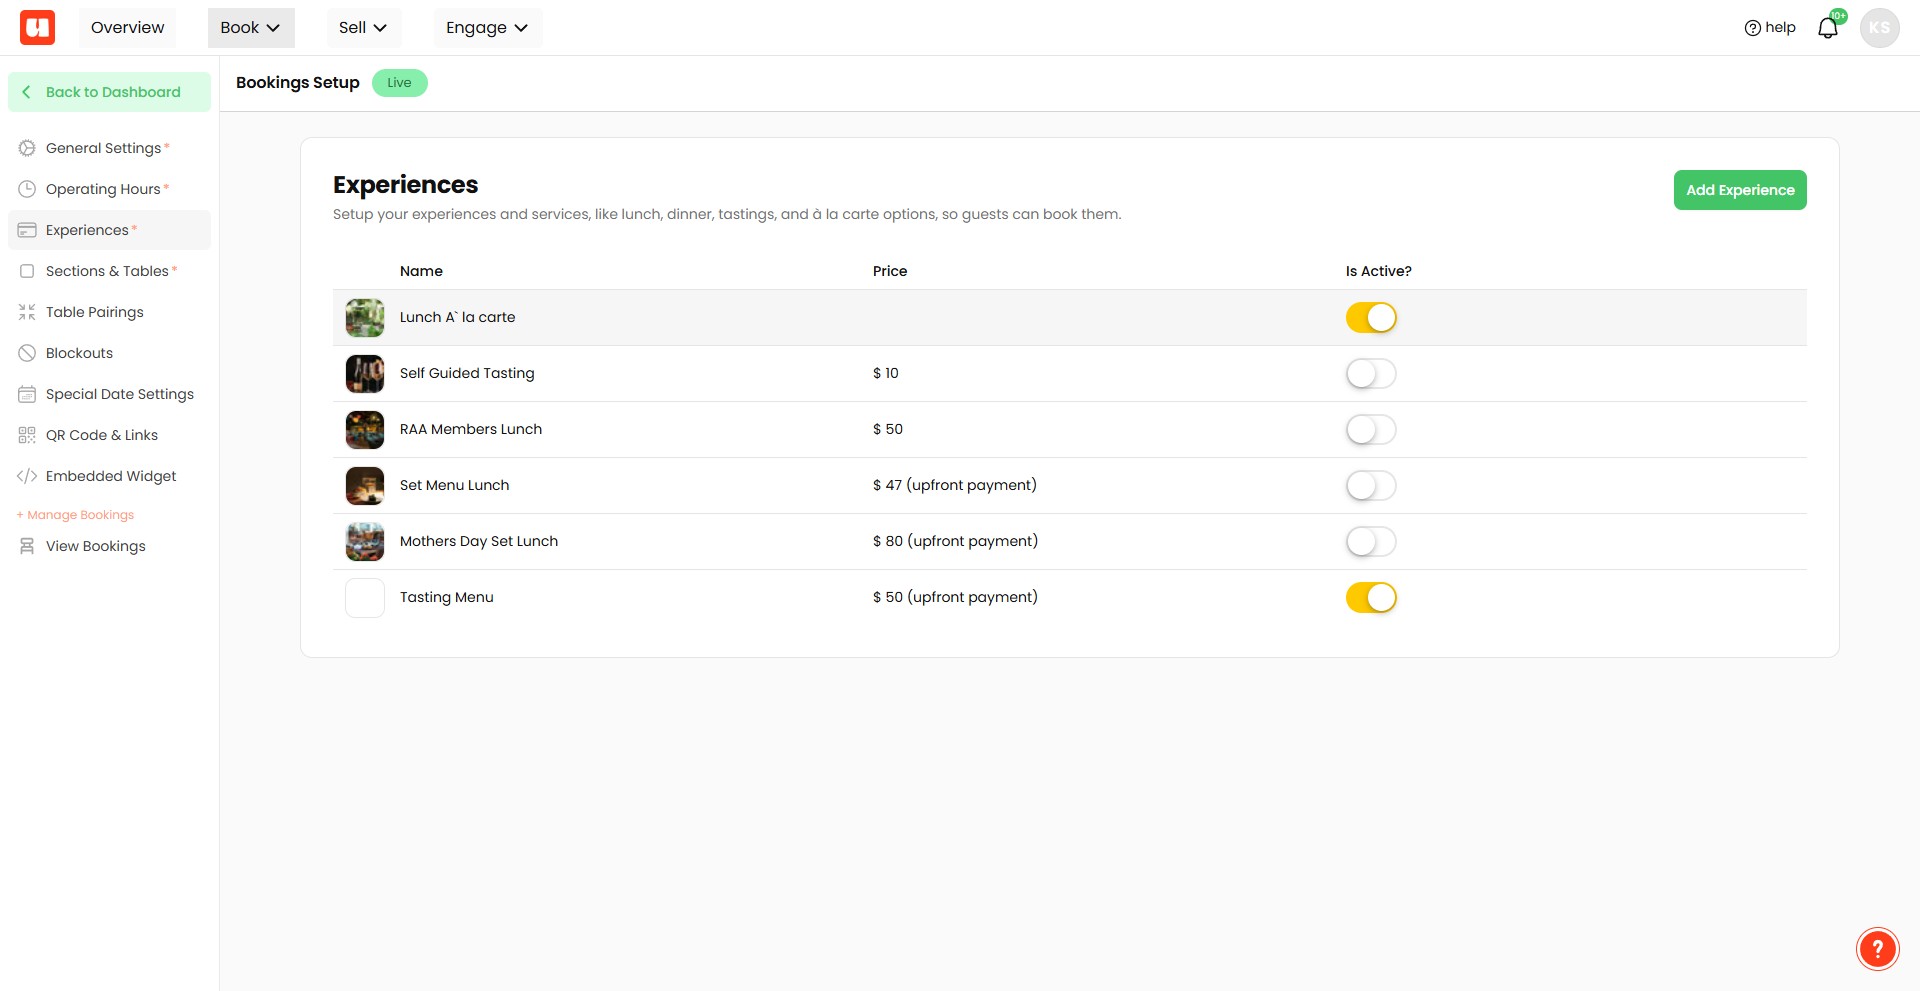
Open the experience you want to configure from the Experiences list
Scroll to Weekly Recurring Hours, or use One-Off or Special Dates if the split sitting is a once-off
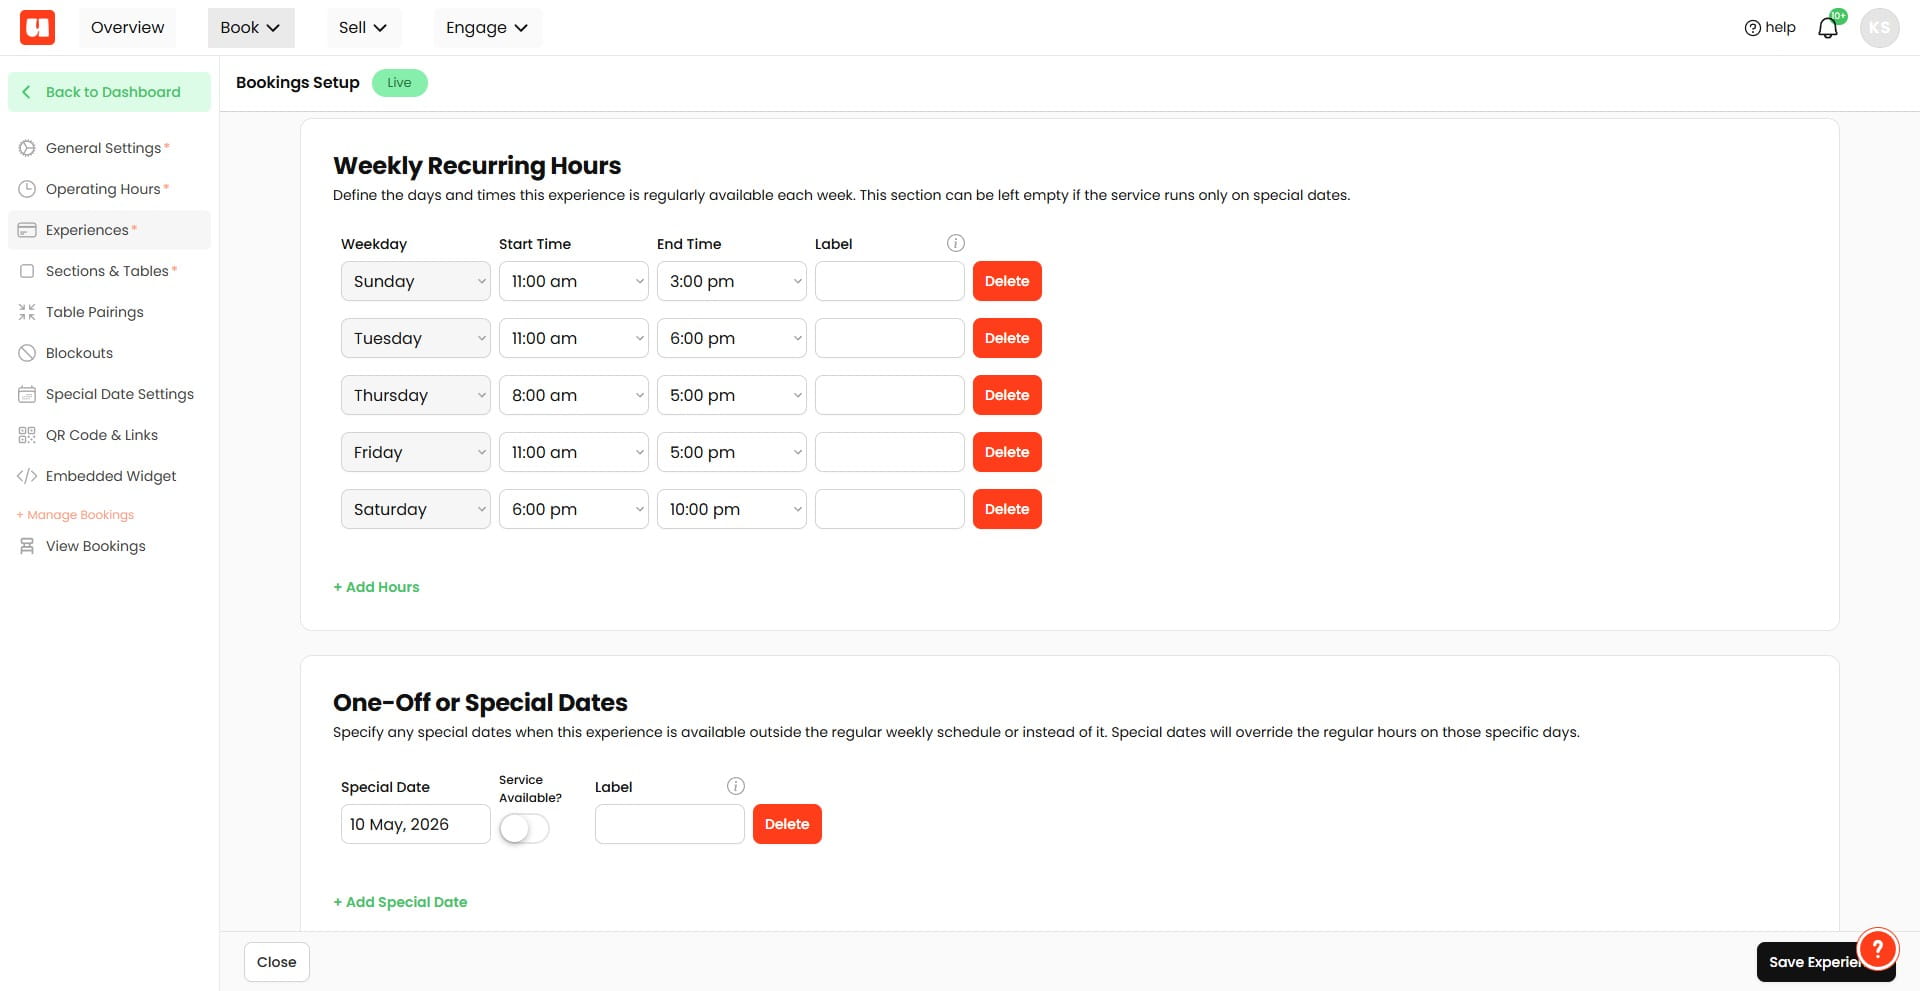
Set the Start Time for your first sitting.
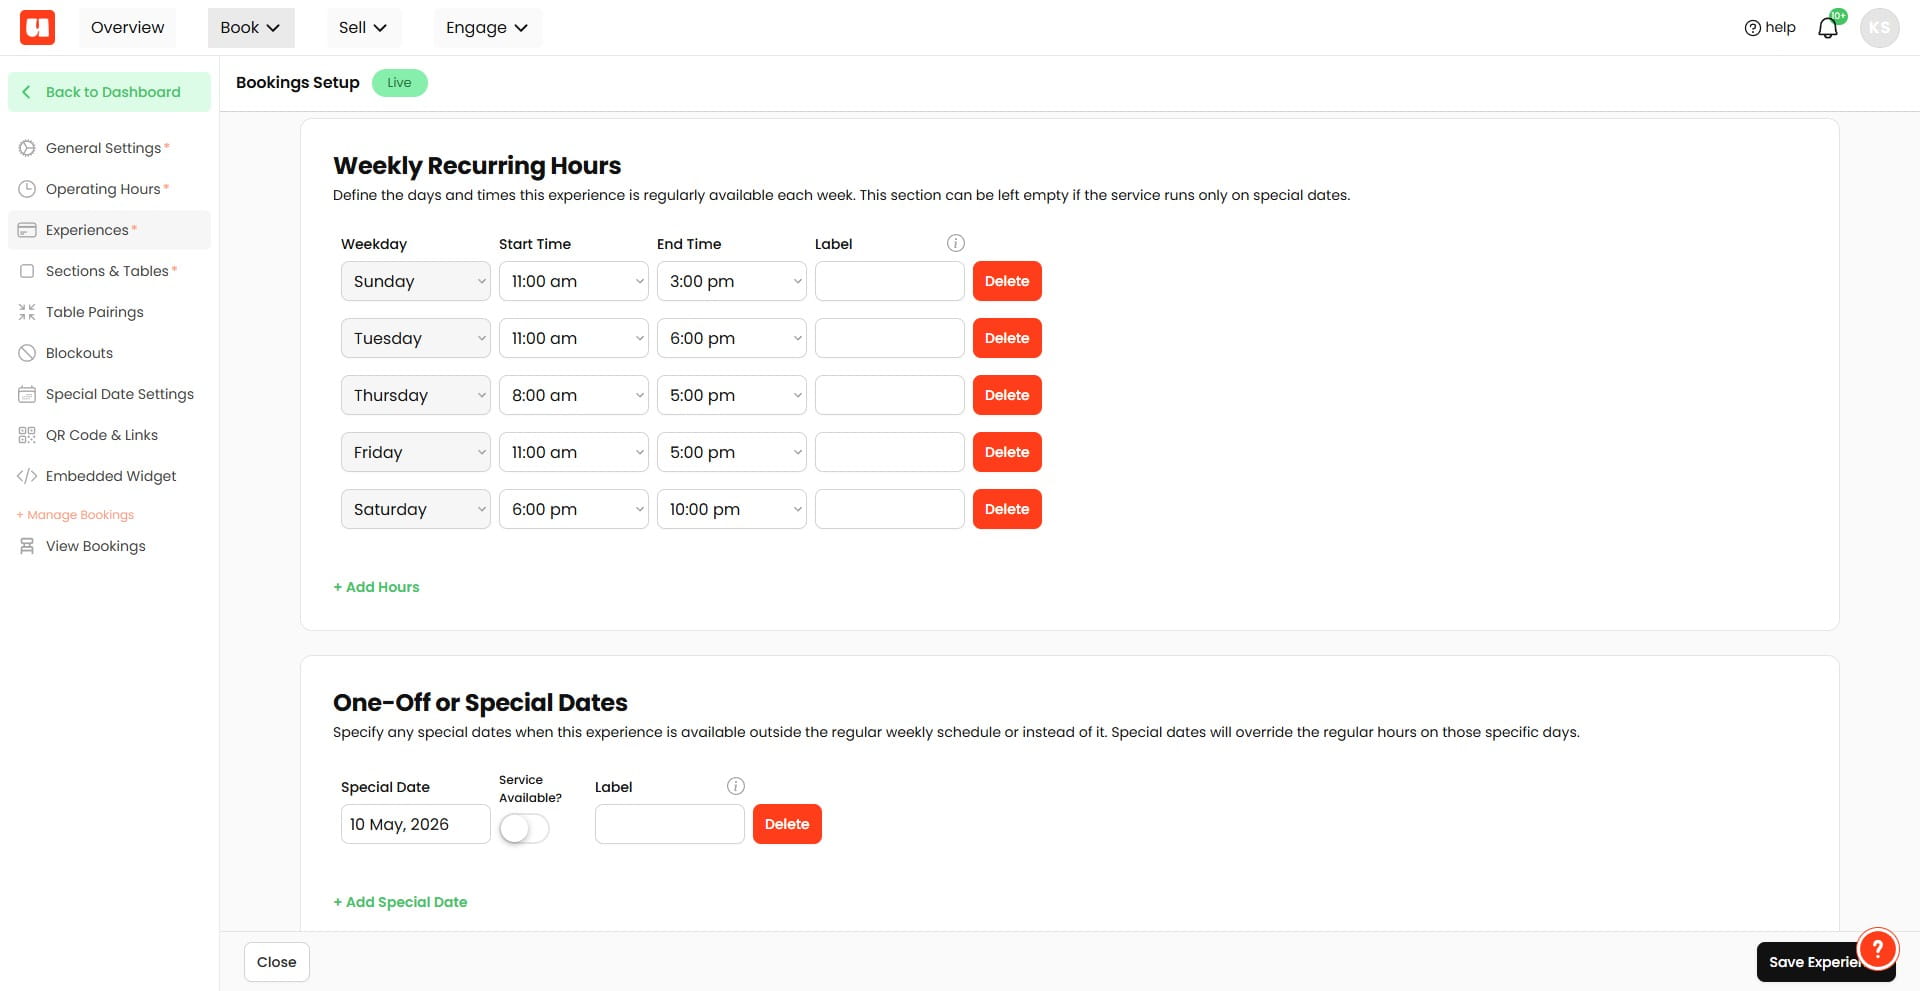
Set the End Time for your first sitting.
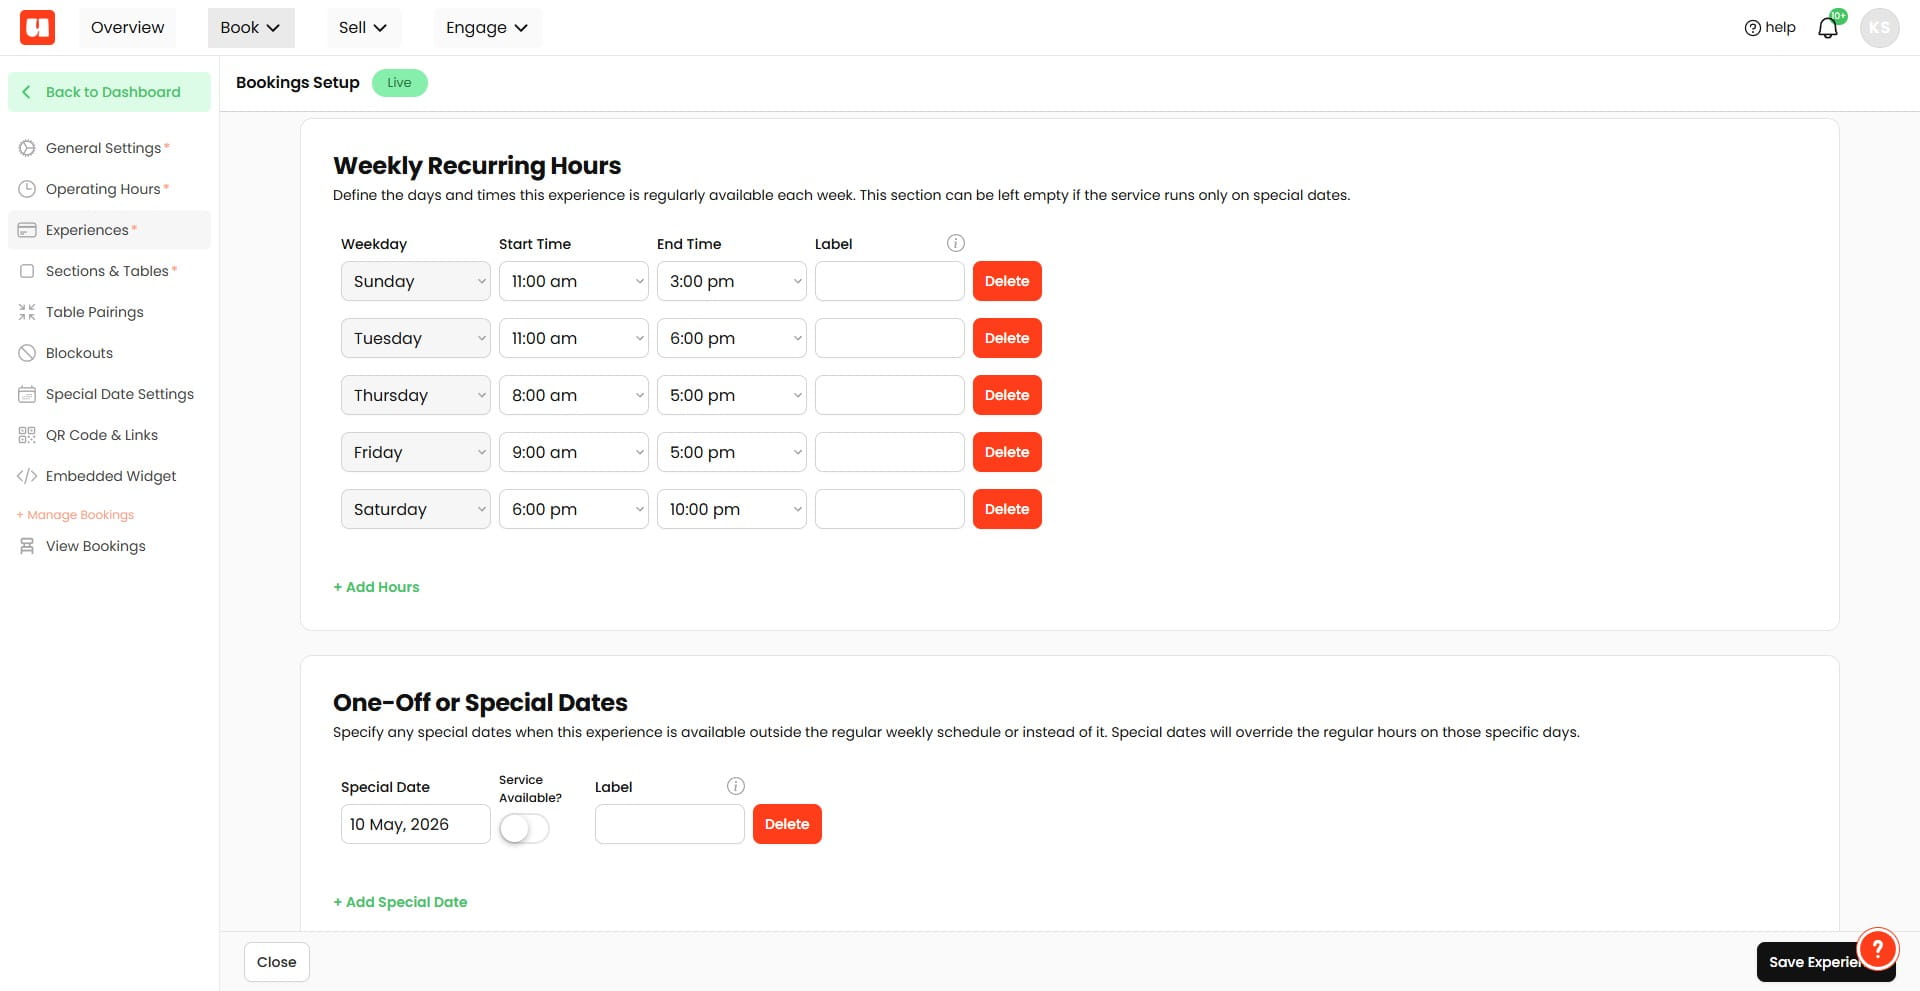
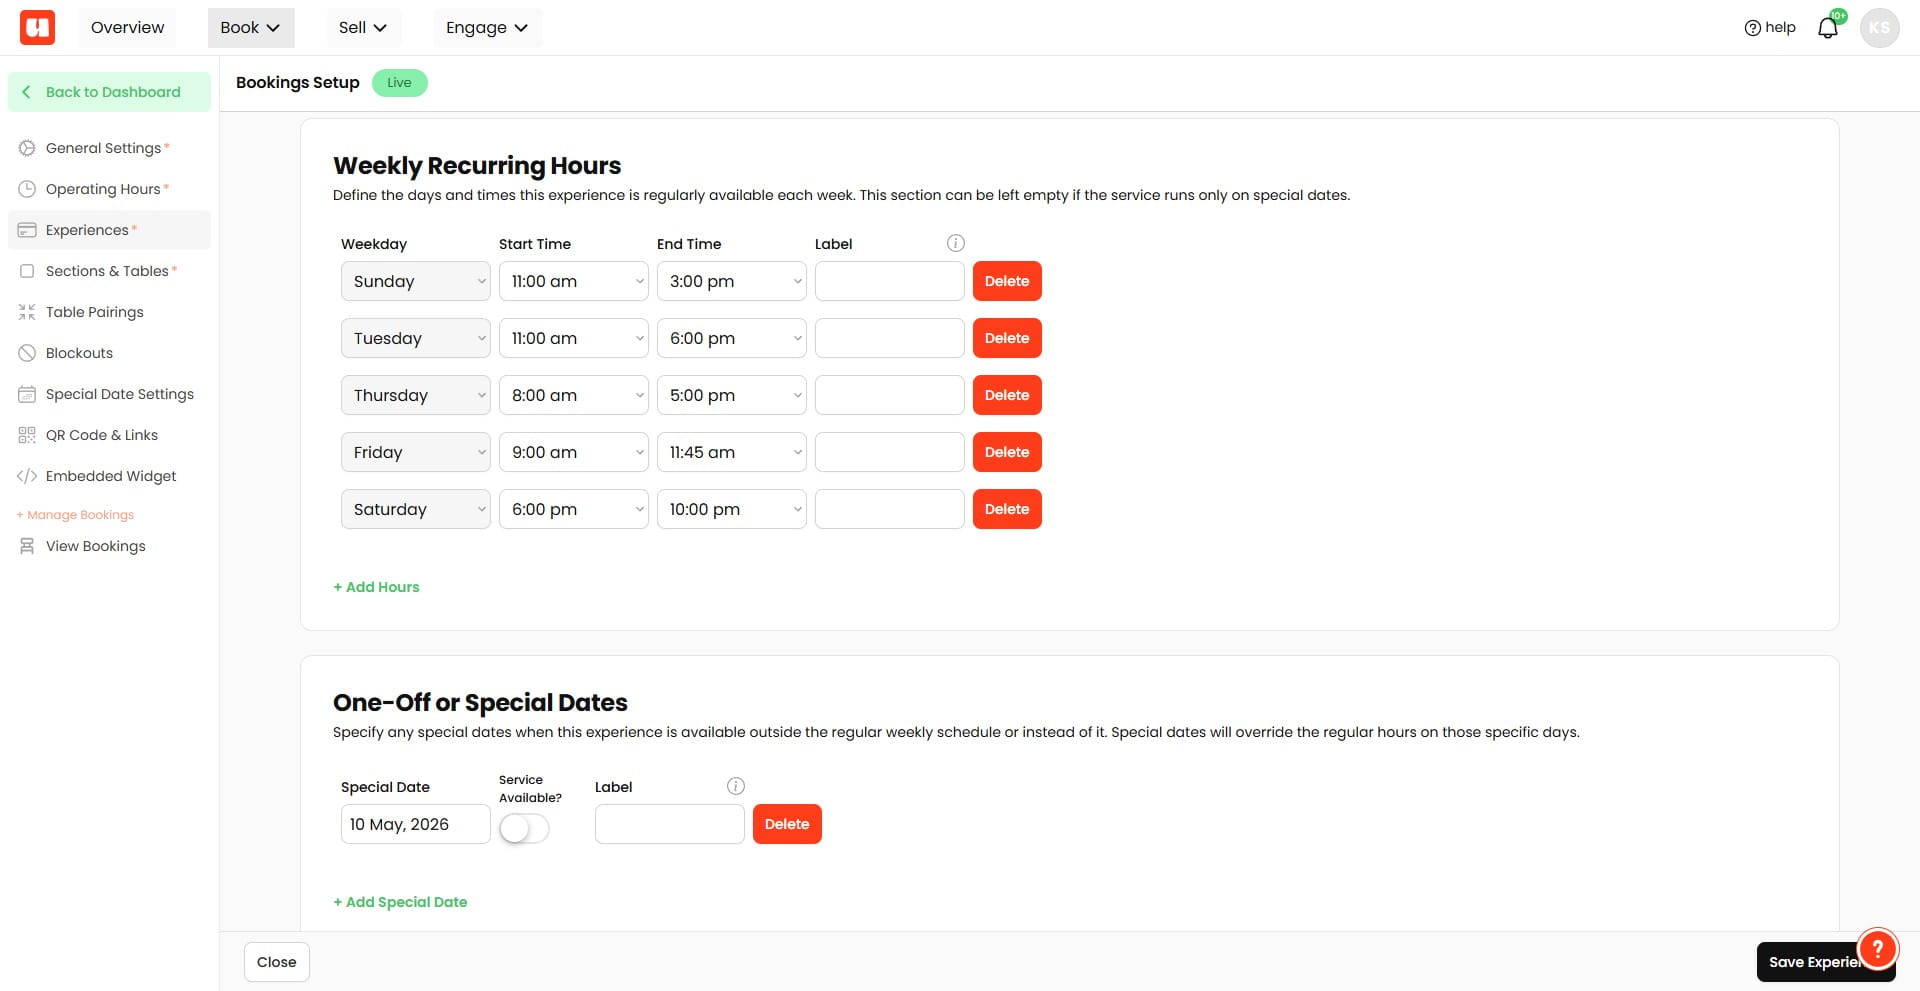
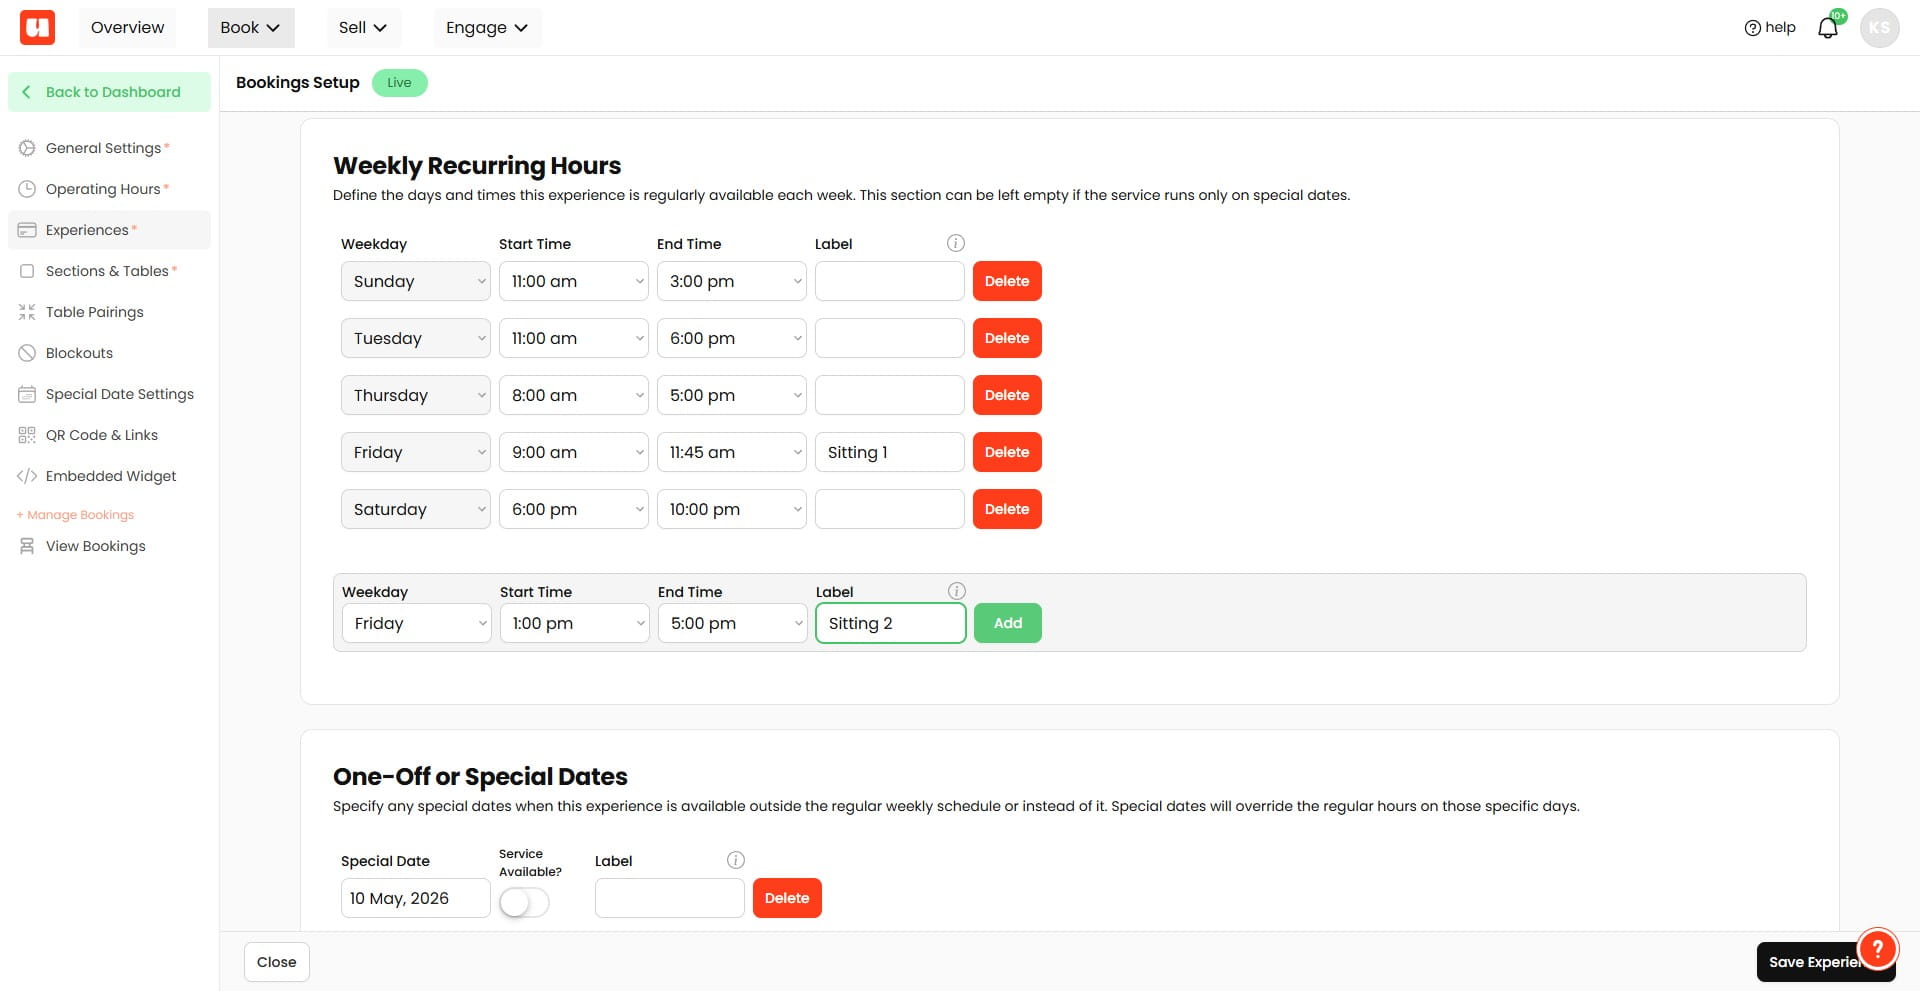
Enter Sitting 1 in the Friday row’s Label field. This field is just for your reference.
Click + Add Hours under the weekly schedule, to add a second sitting.
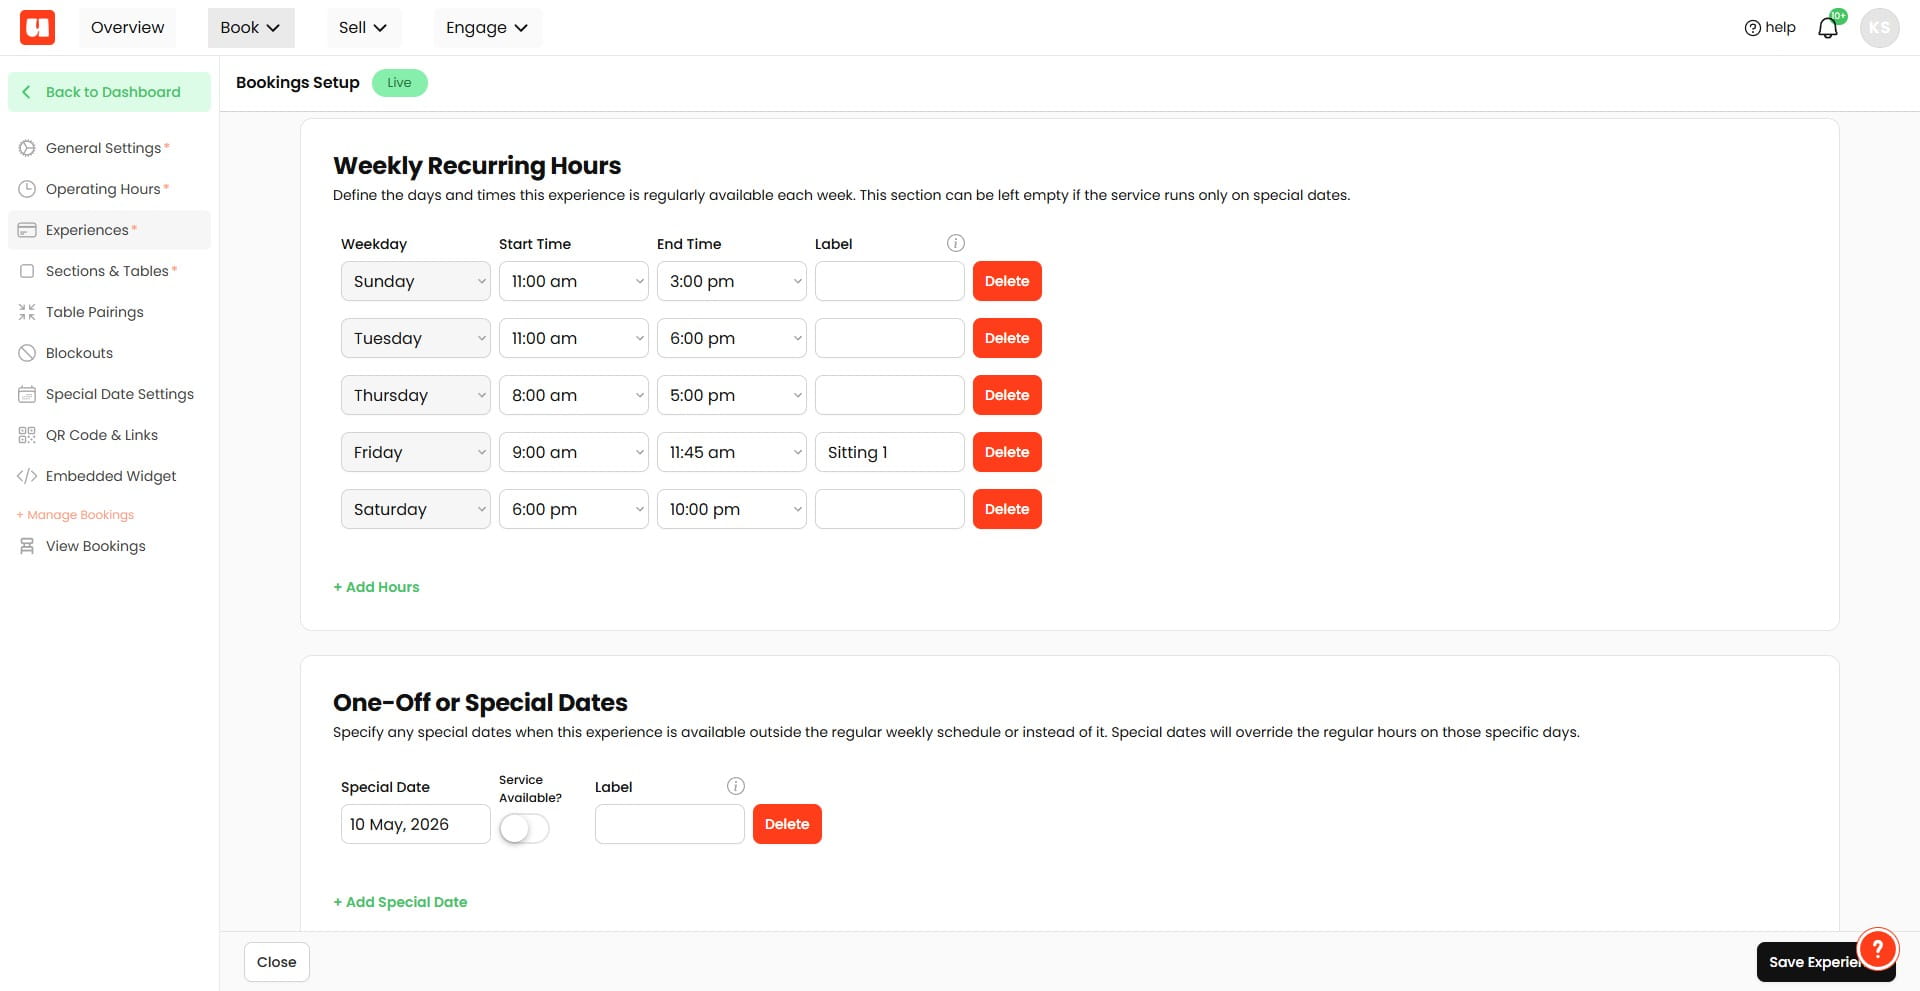
Click Add on the new Friday row to add the second sitting
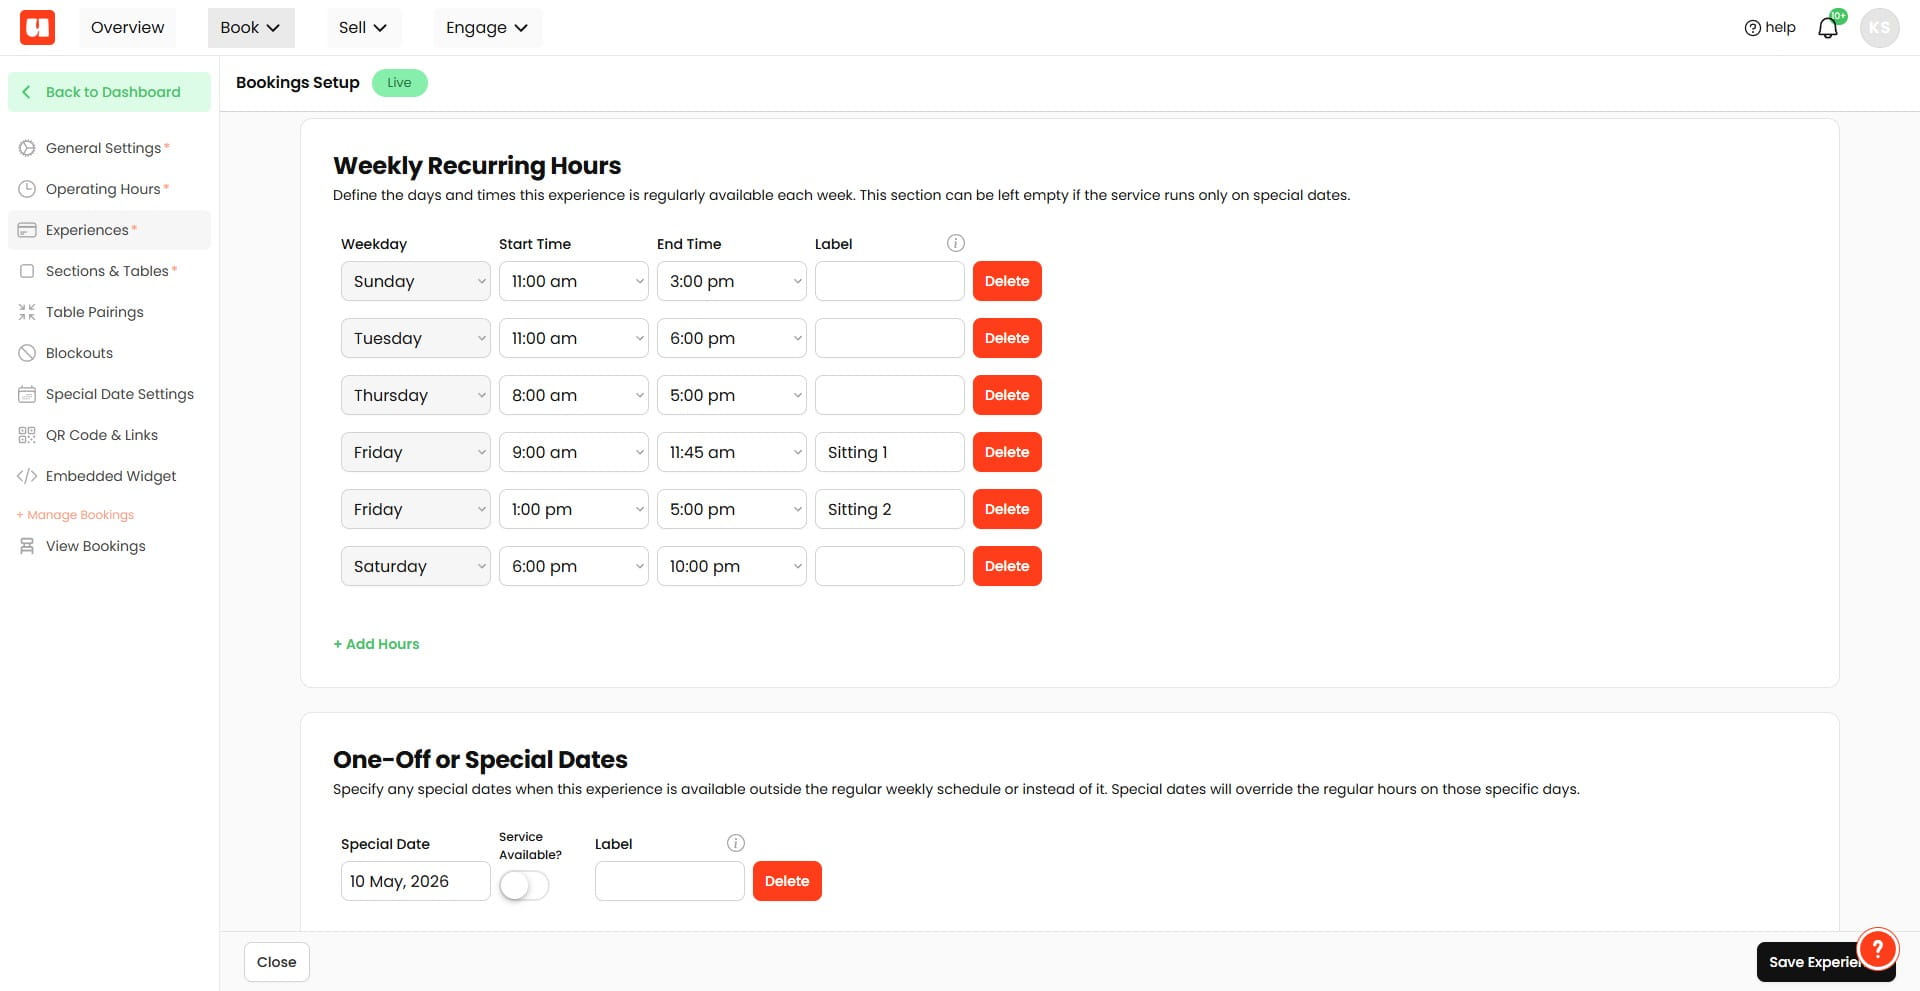
Return to the Weekly Recurring Hours section to review both Friday sittings
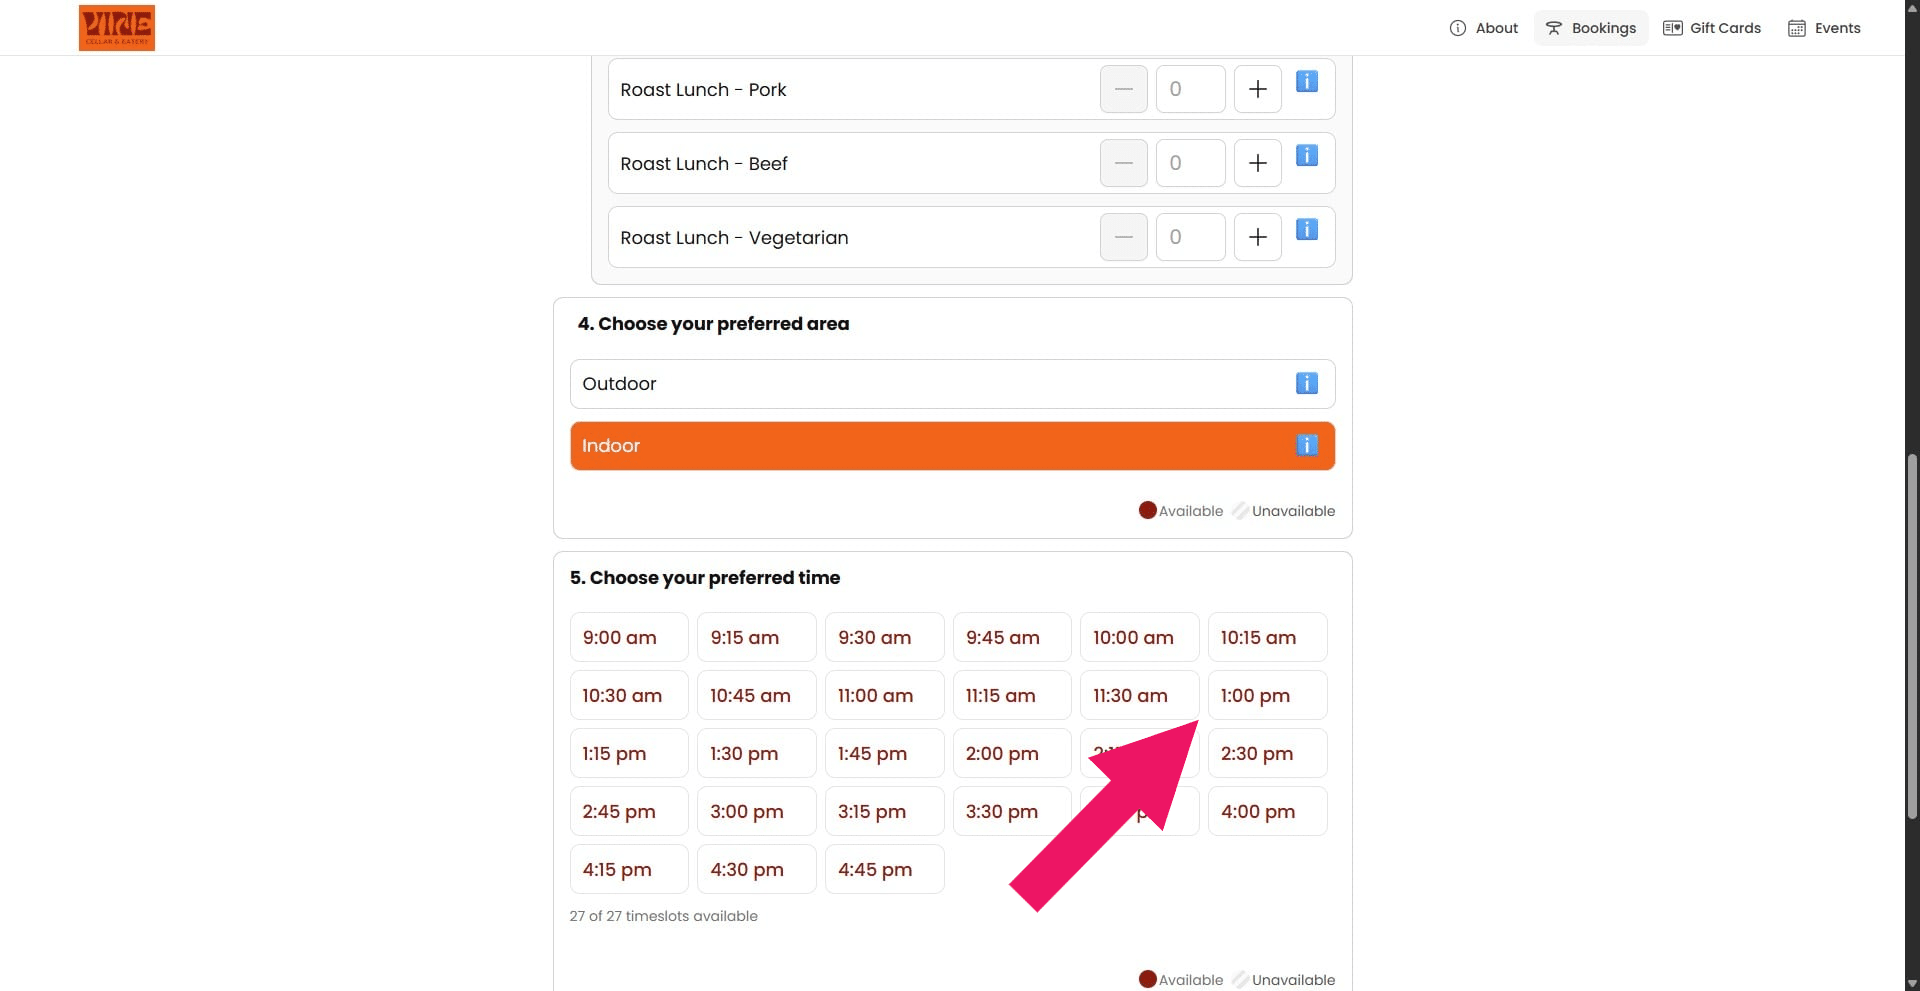
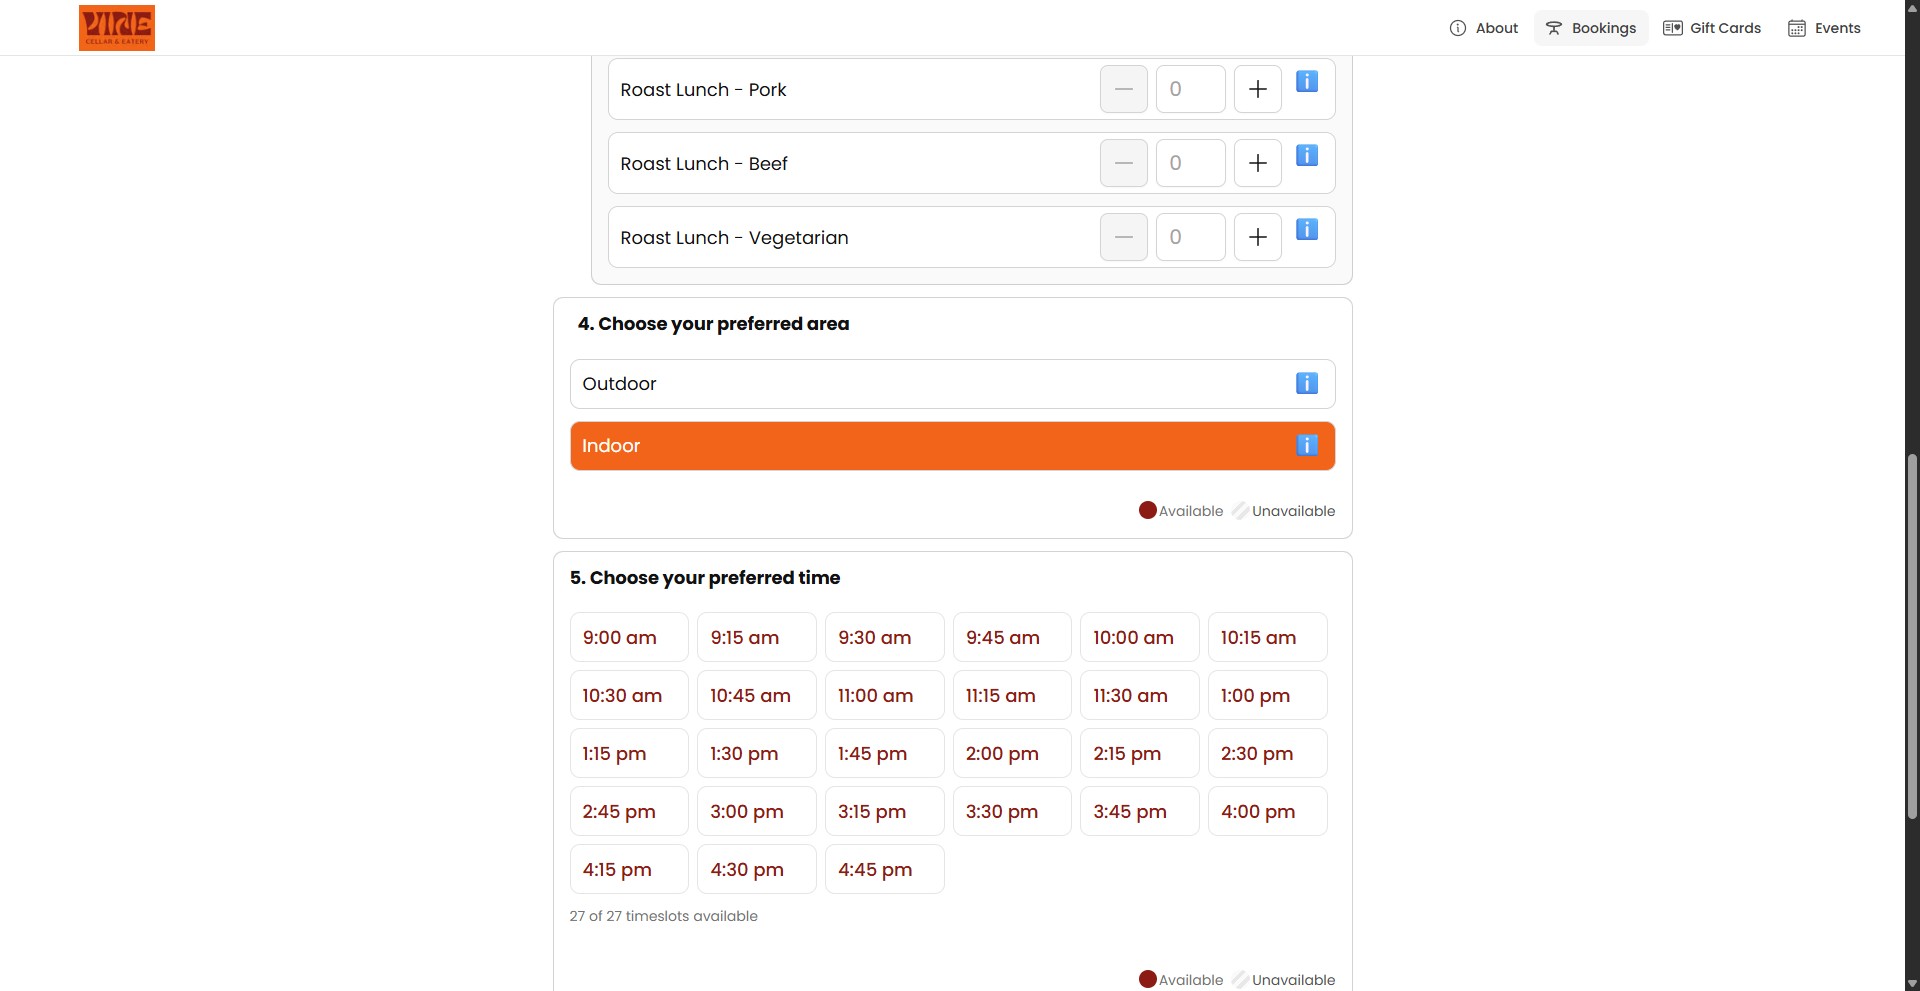
Review the customer-facing booking page to check how the split sitting times appear during booking
Done 🚀
Frequently Asked Questions
- Where do I configure split sittings for an experience?
Go to Bookings > Actions > Setup Bookings > Experiences, then open the experience you want to configure.
- Should I use Weekly Recurring Hours or One-Off or Special Dates?
Use Weekly Recurring Hours for a split sitting that repeats each week. Use One-Off or Special Dates when it should apply only once.
- What is the sitting label used for?
The sitting label is for your reference. For example, you can enter Sitting 1 in the schedule’s Label field.
- Where can I check how the split sittings appear to customers?
Review the customer-facing booking page after adding the sittings to check how their times appear during booking.