How to Add Options to Your Booking Experience
Enhance your booking experience by offering customers the ability to select specific options related to their experience, such as meal choices or special requests. This feature helps you gather valuable information on customer preferences in advance, enabling you to better plan inventory, staff, and logistics. Options can be customised, activated, or deactivated as needed for each experience, ensuring flexibility and control over your offerings.
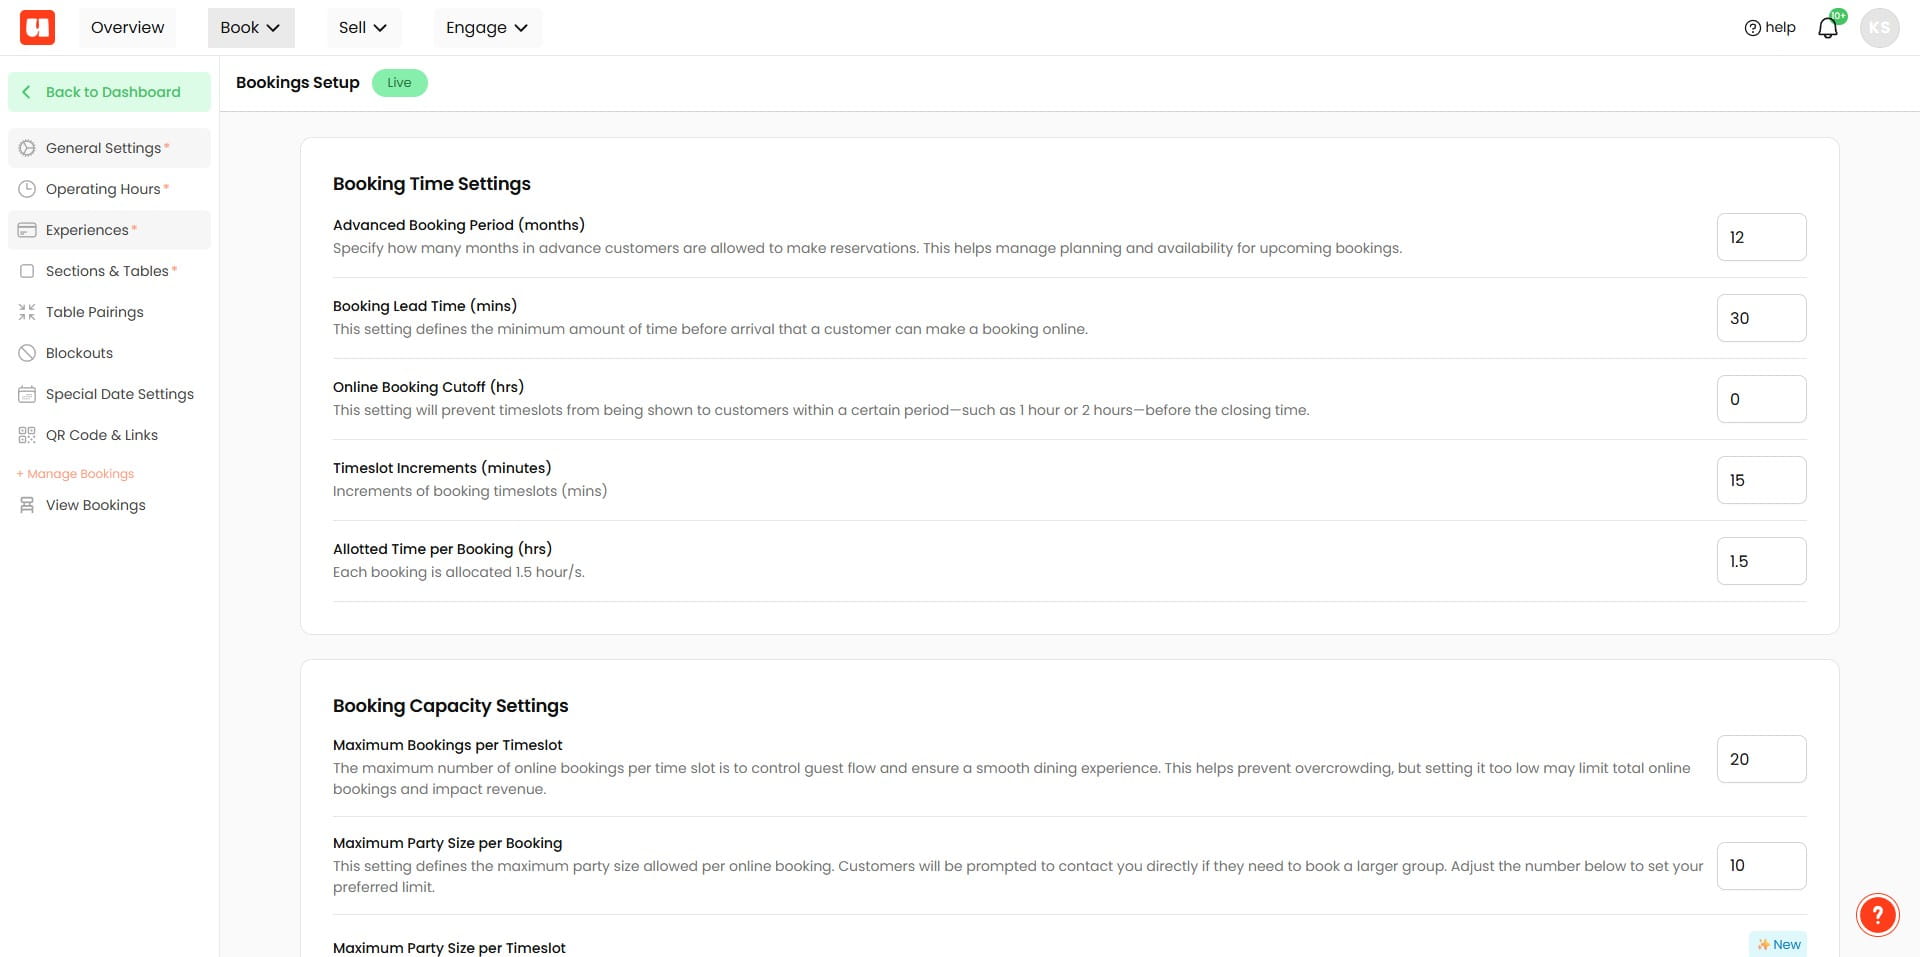
Access Booking Settings
Go to your booking system and navigate to the Booking Settings.
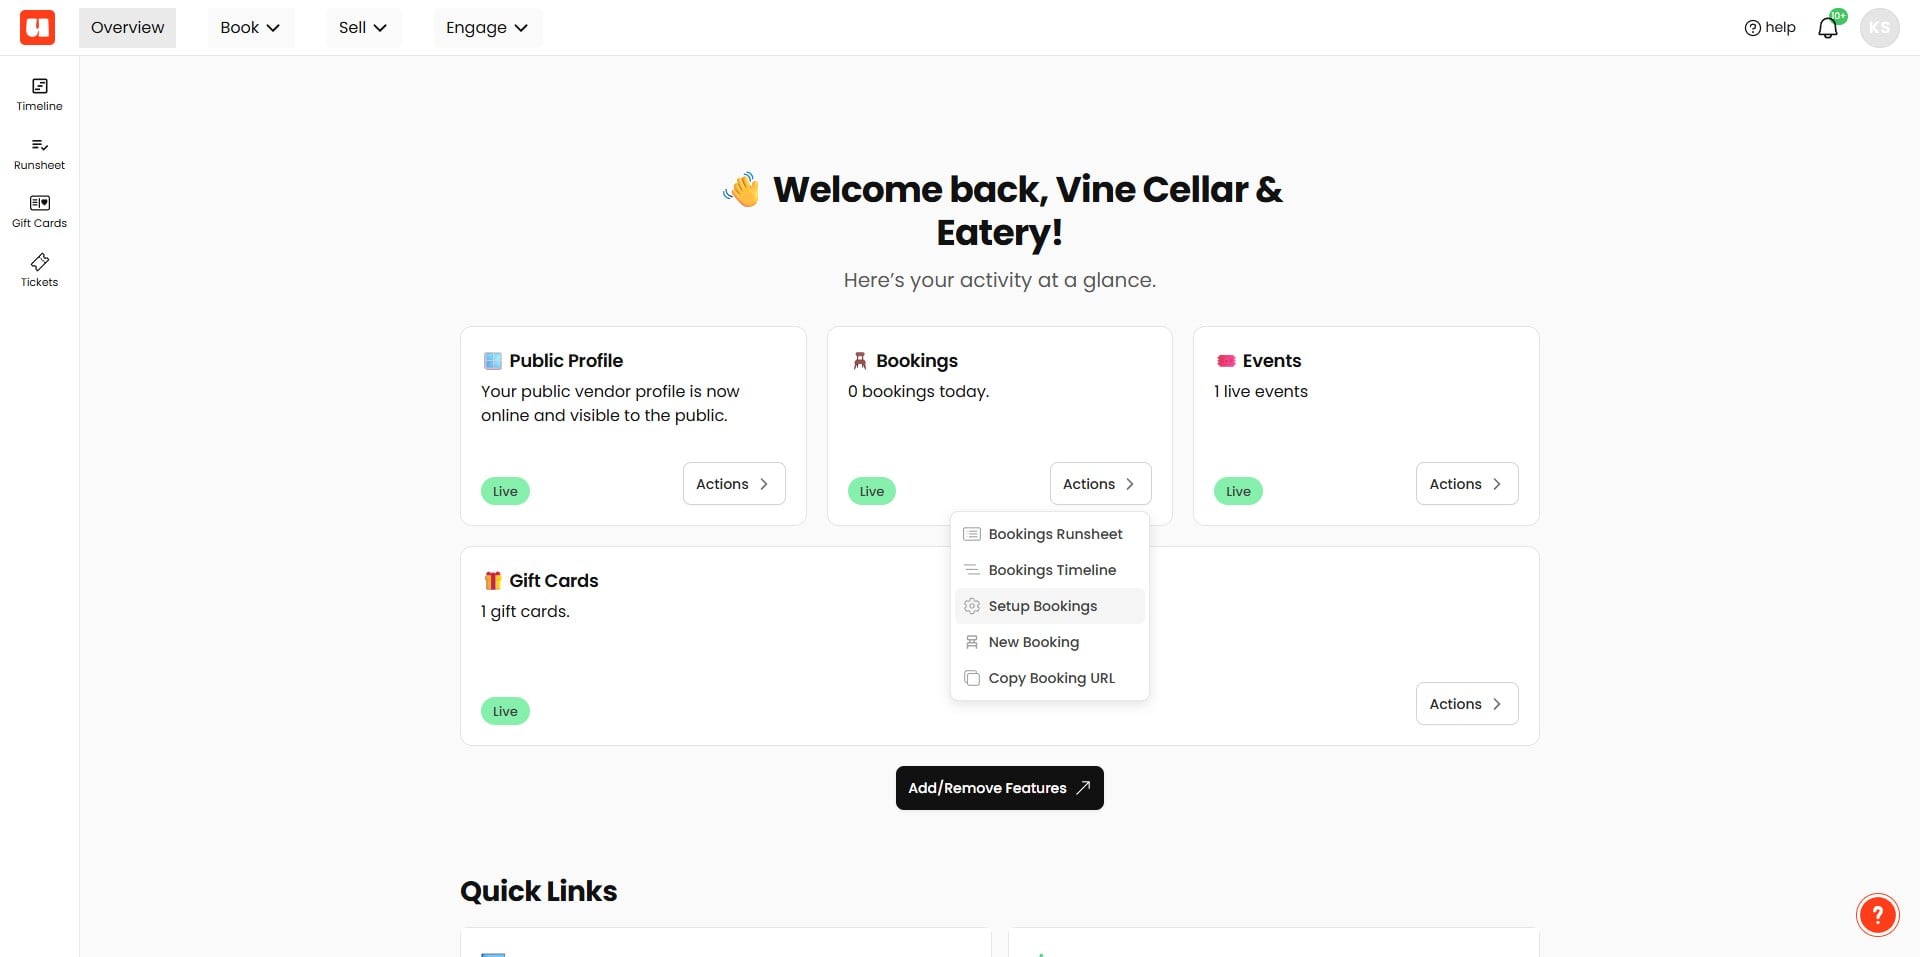
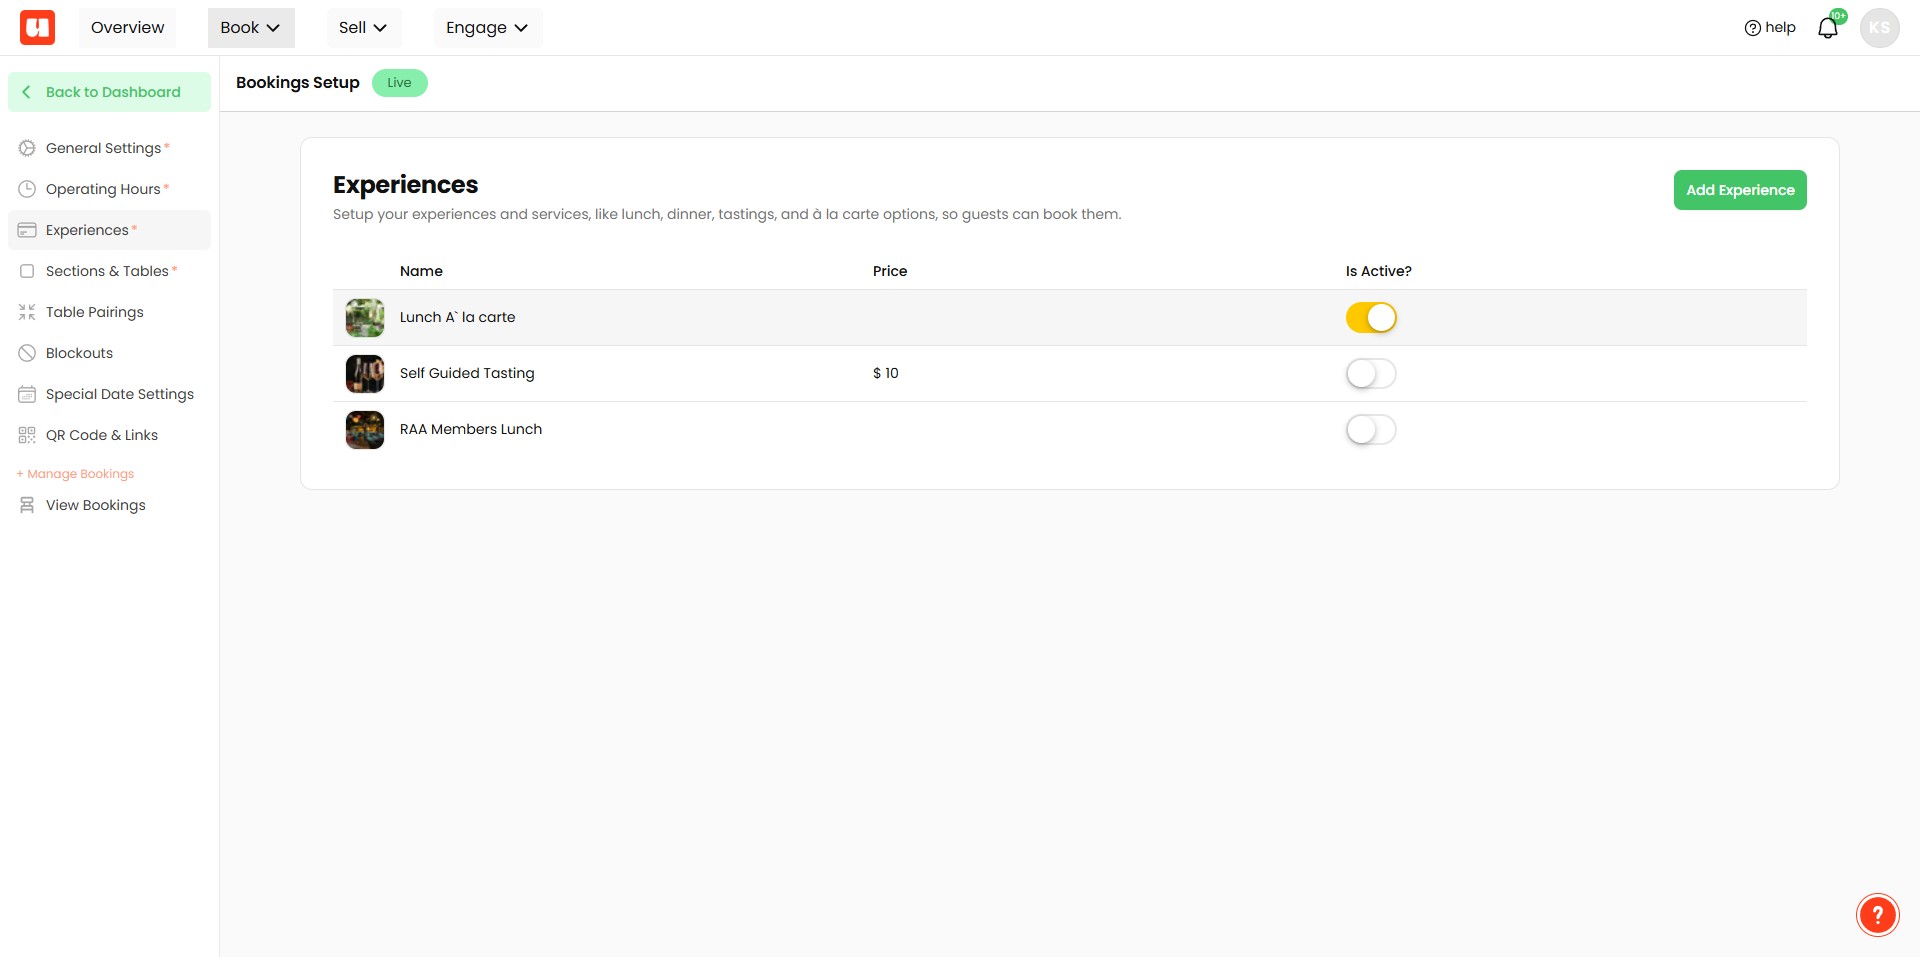
Click on "Experiences"
Open the experience you want to add options to, such as "Lunch" or "Dinner."
Scroll to the Add-on Options section
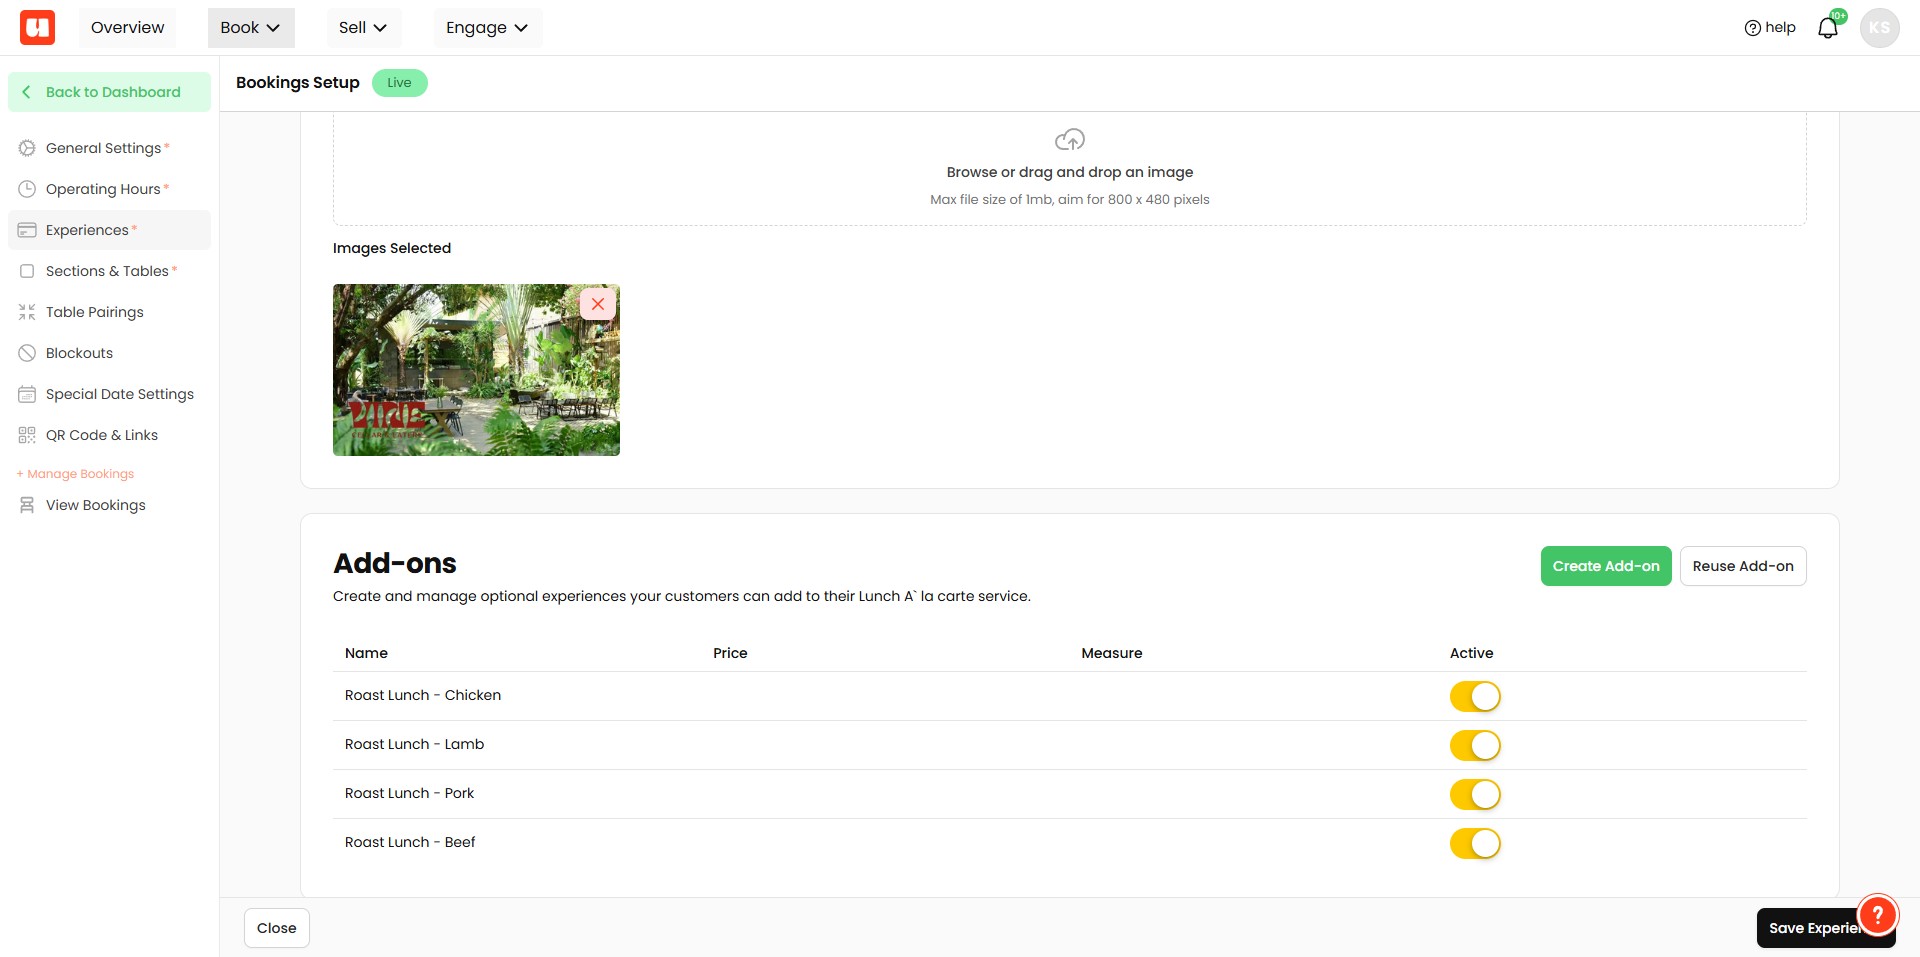
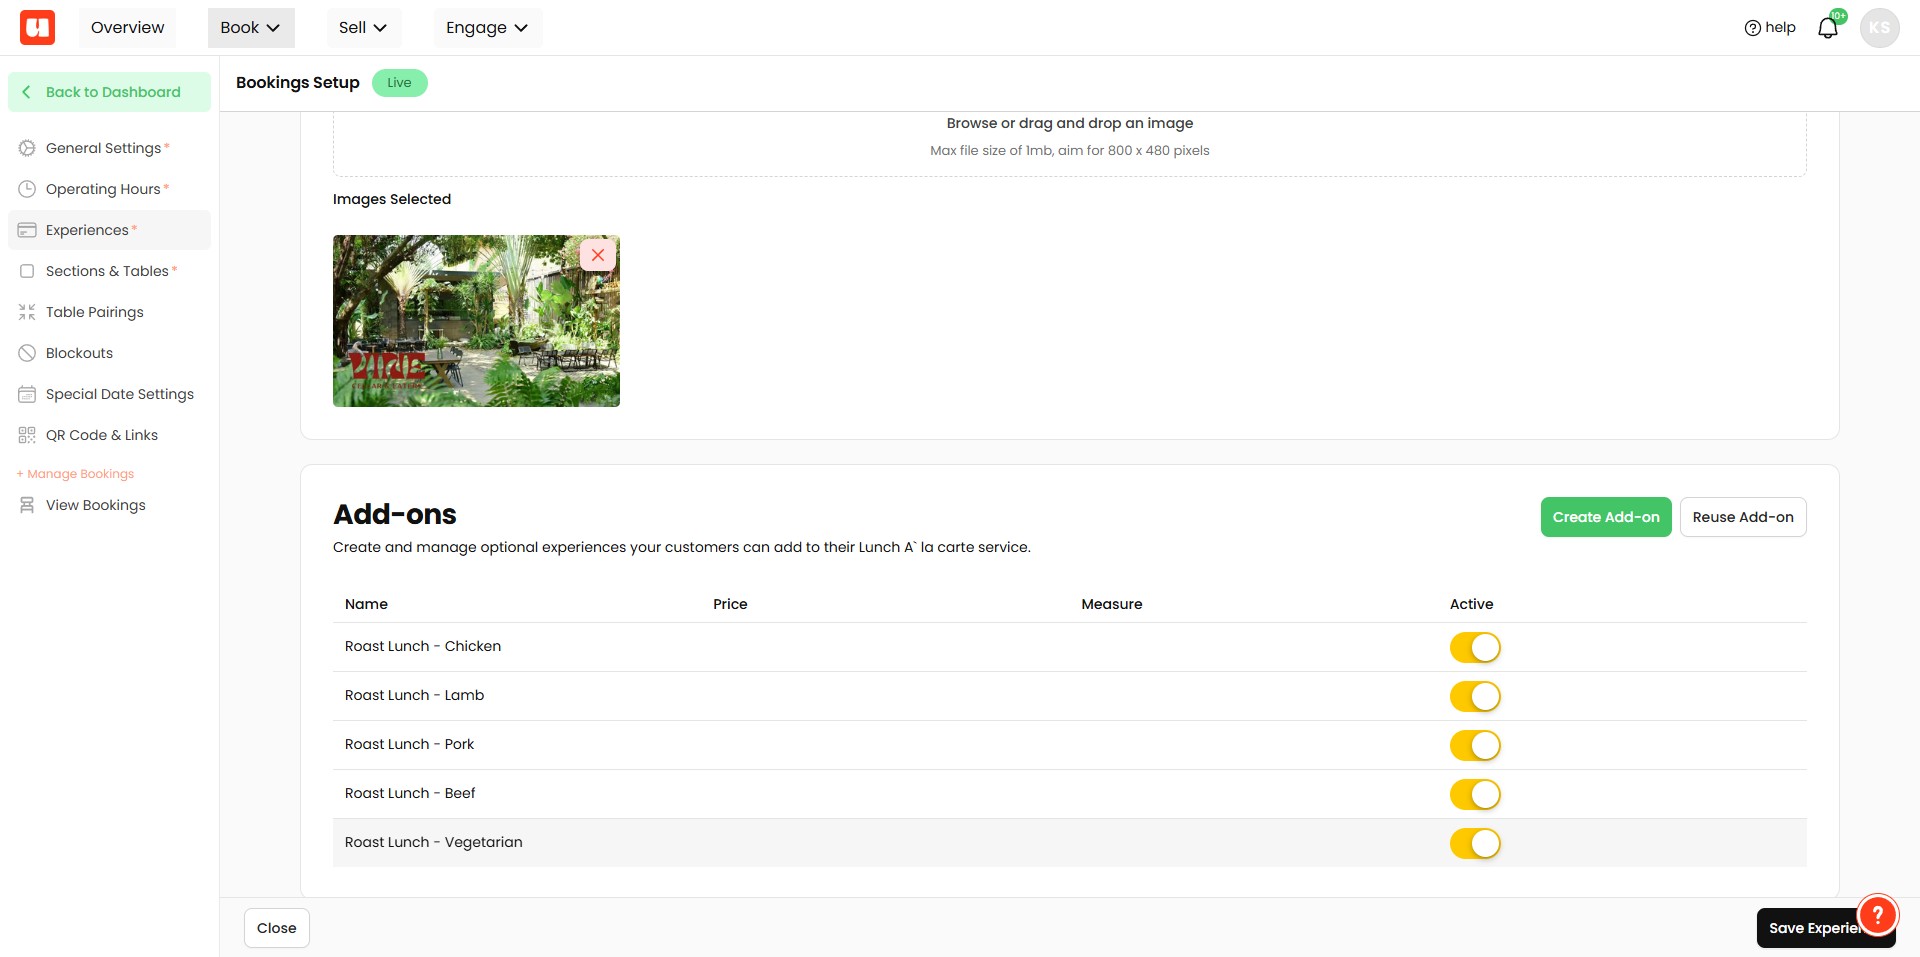
Click on "Create Add-on" to create a new option.
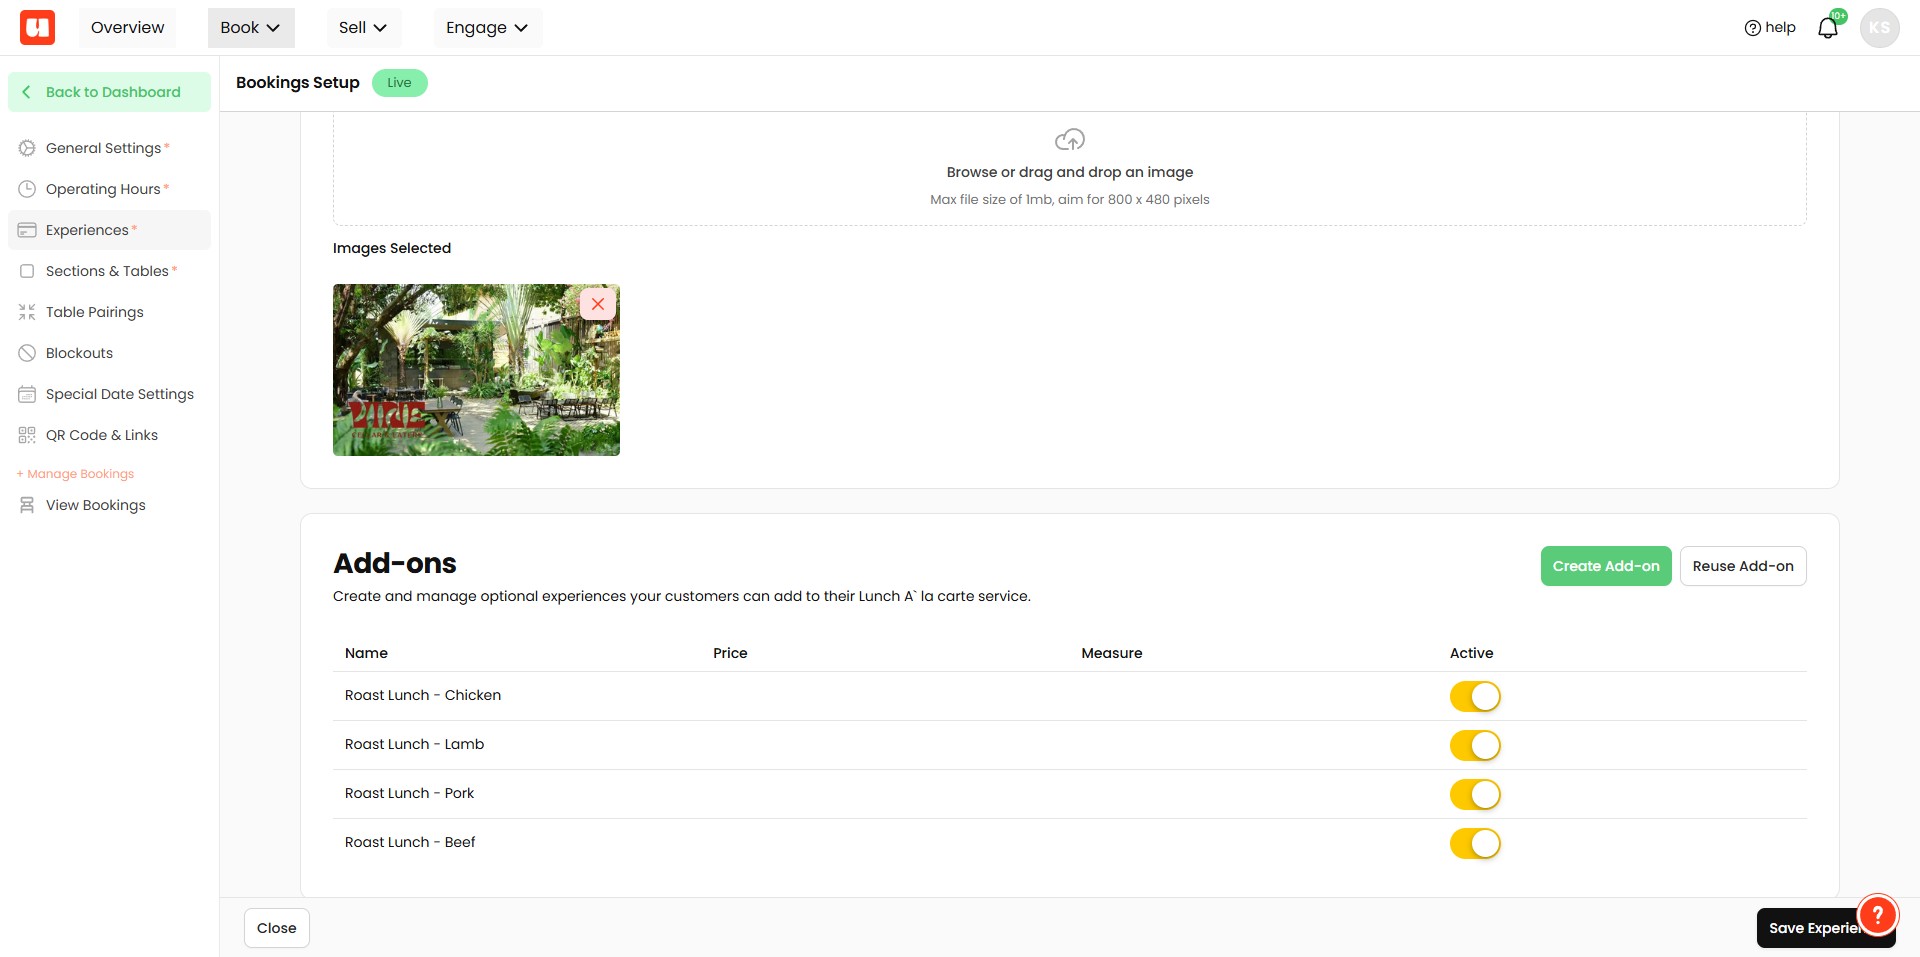
Price details can be optionally added to give customers an idea of cost. Leave blank if you don't want pricing options to show. Click 'Save Add-on' to finish
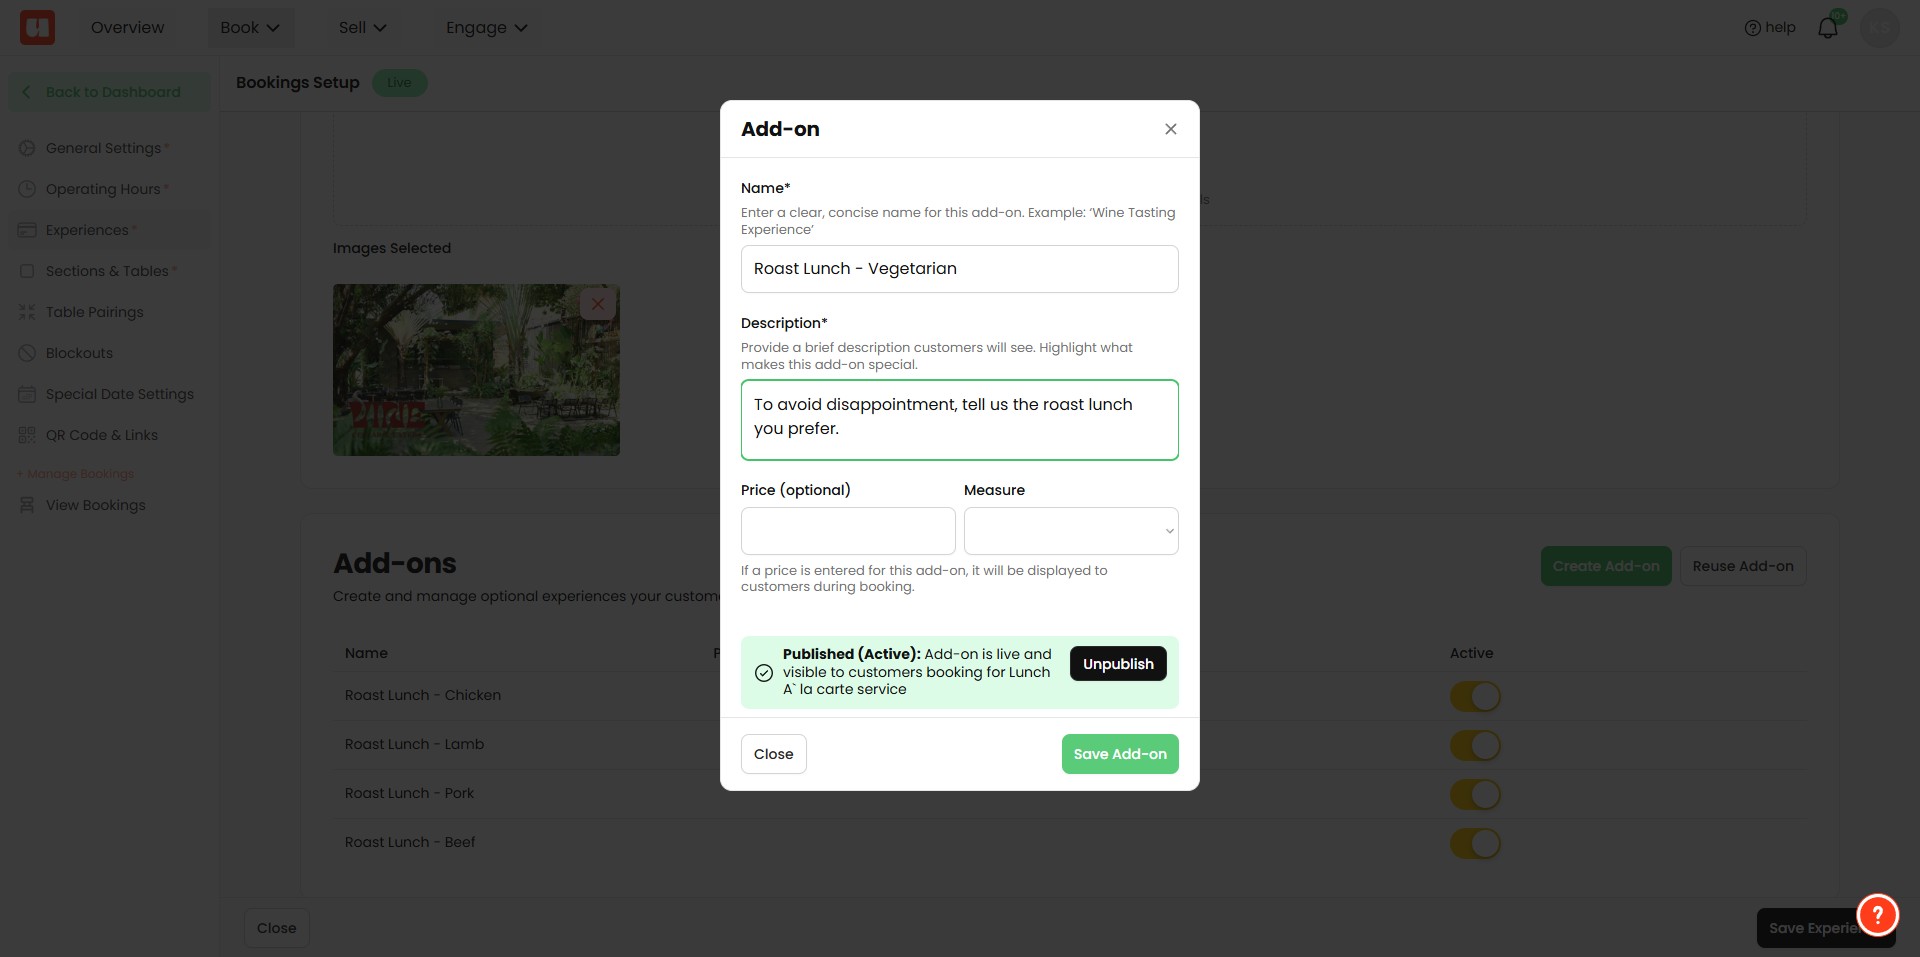
Make sure your Add-on option is active. You can always turn this
How It Works for Bookings
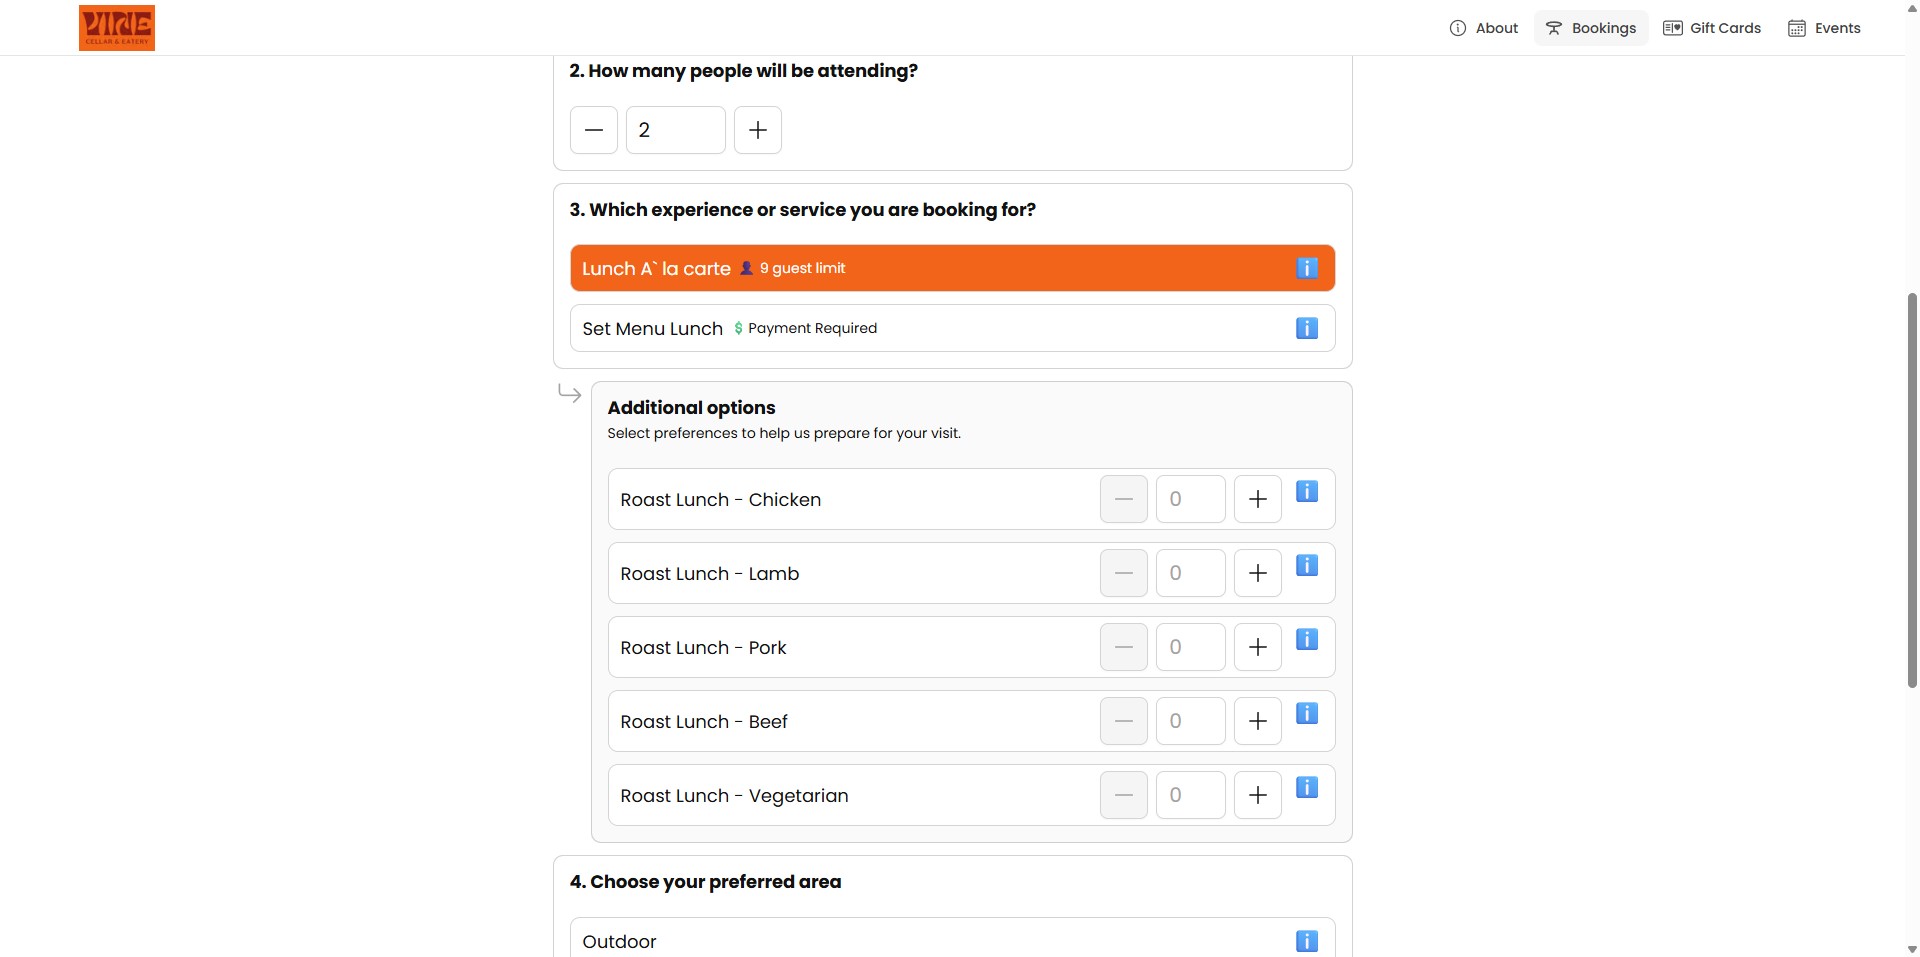
Now, when customers book online if they select the experience you've added options against they'll get additional options to choose from.
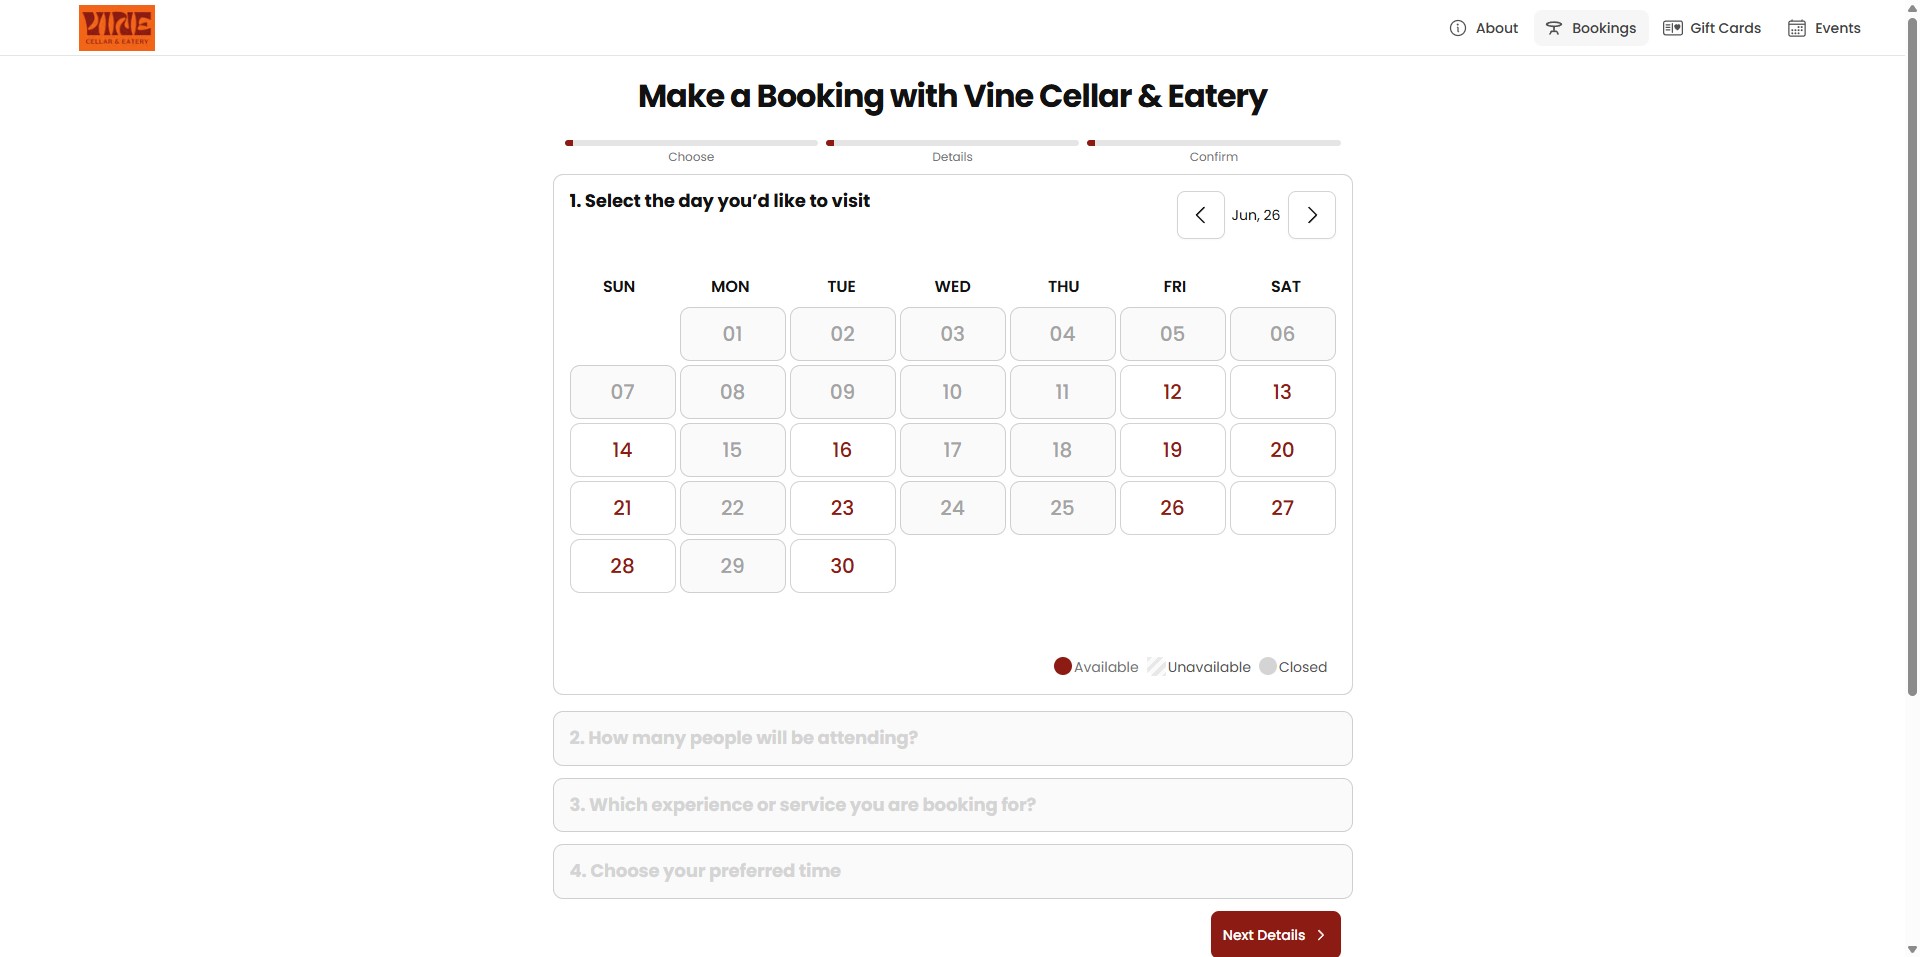
They can optionally add the number of options up to their booking guest limit.
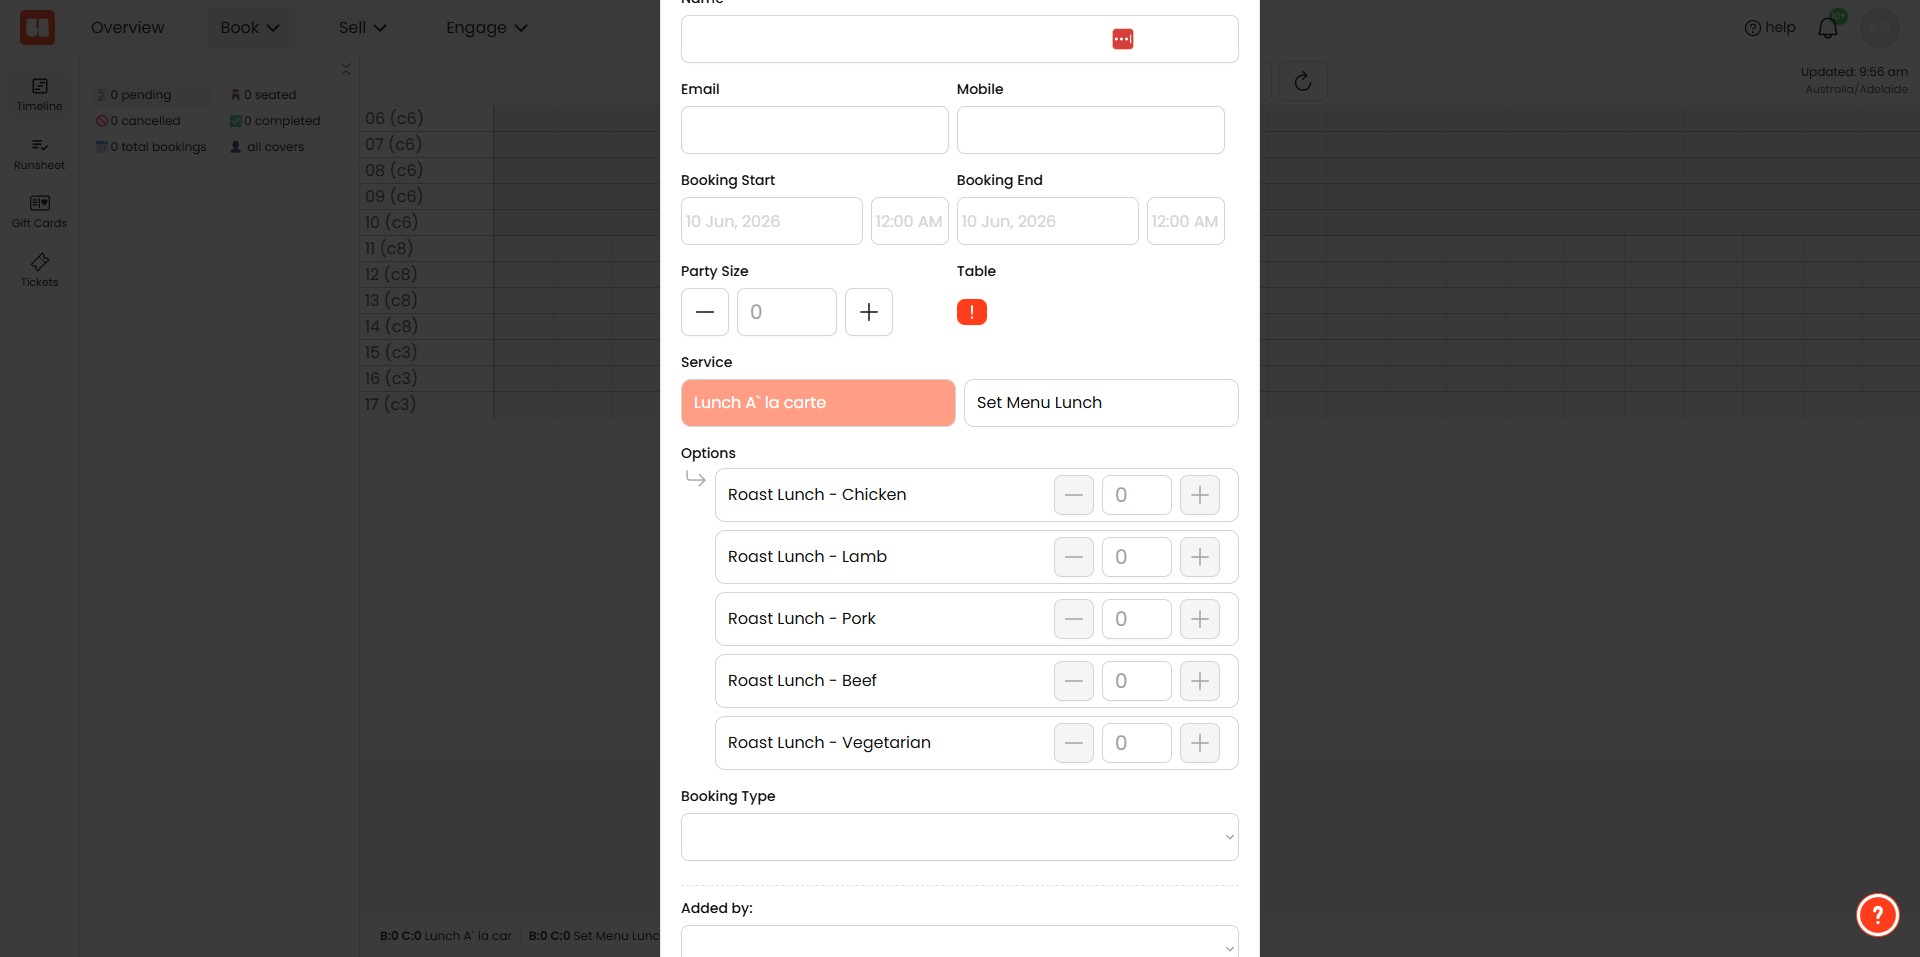
Back in your Booking Dashboard
When you add bookings via your dashboard, you'll also see these options.
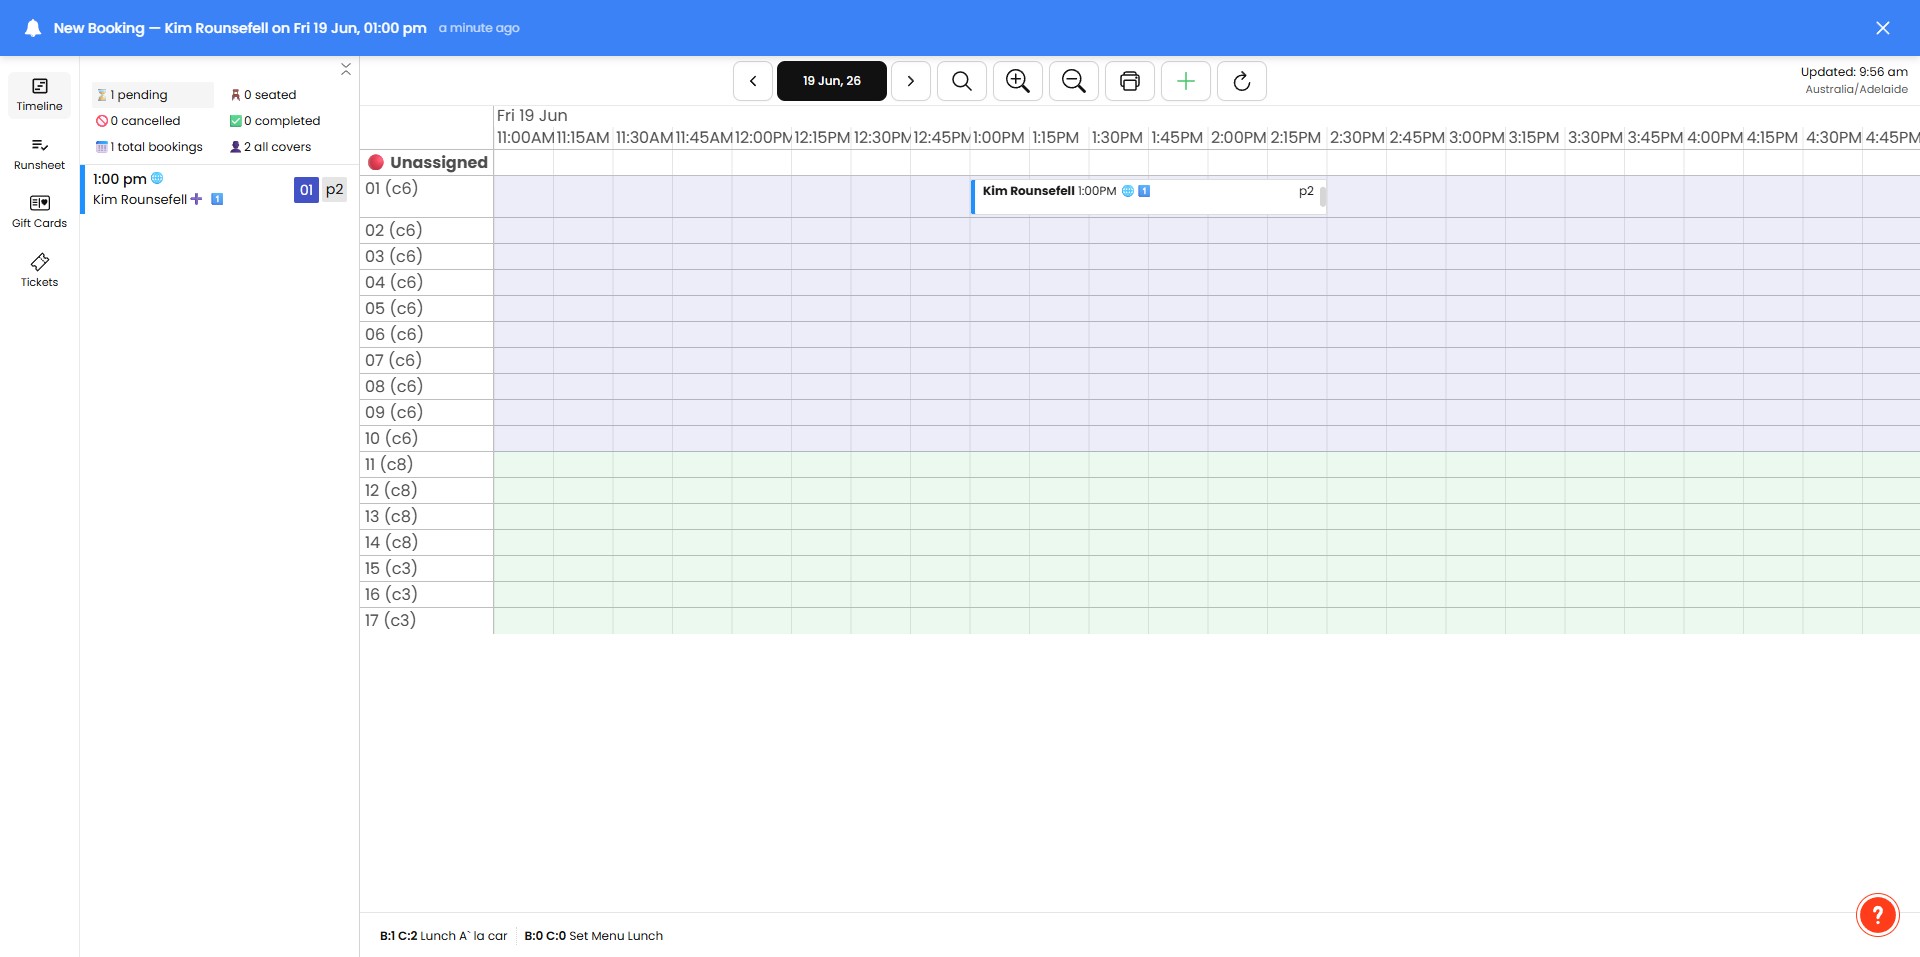
Bookings with Options added will have a '+' icon.
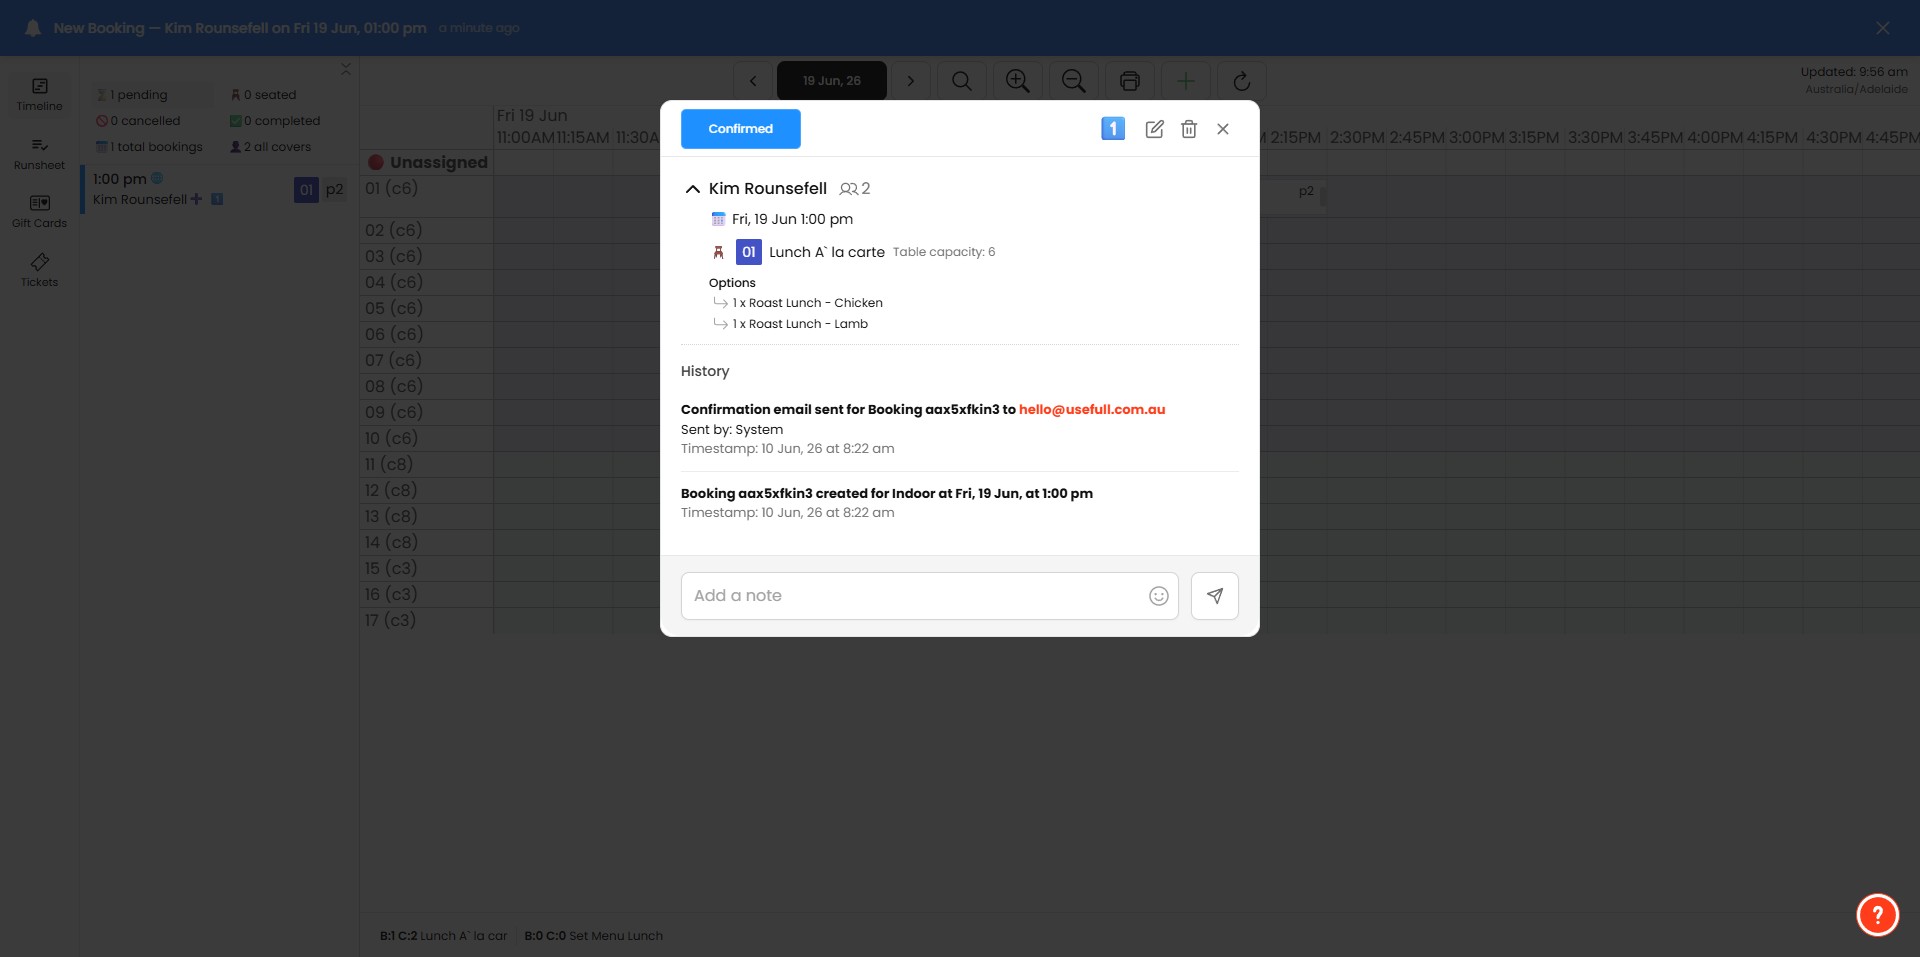
And when you open the booking they are visible to assist with planning.
Frequently Asked Questions
- How do I add an add-on option to an experience?
Go to Booking Settings → Experiences, open the experience (for example “Lunch” or “Dinner”), scroll to the Add-on Options section and click “Create Add-on.” Optionally enter price details, then click “Save Add-on.” Make sure the Add-on option is active so it appears to customers.
- Do I have to include a price for an add-on?
No. Price details are optional — leave the price blank if you don’t want pricing to show. After configuring, click “Save Add-on.”
- How do add-ons appear to customers when they book online?
When customers select the experience you’ve added options to, they’ll be shown the additional add-on options. They can choose quantities up to the booking guest limit.
- How do add-ons appear in the Booking Dashboard or when I add bookings manually?
When you add bookings via your dashboard, the same add-on options are visible. Bookings that have options added will show a '+' icon; open the booking to view the selected options and assist with planning.
- What should I check if customers can’t see an add-on or can’t add the quantity they want?
Ensure the add-on has been created against the correct experience and that the Add-on option is active. Also note customers can only add quantities up to the booking guest limit, so they won’t be able to exceed that limit.